In this lesson, we will learn how to protect cells from change and make them fixed values in Excel using the protect sheet option.
Suppose we have the following information.
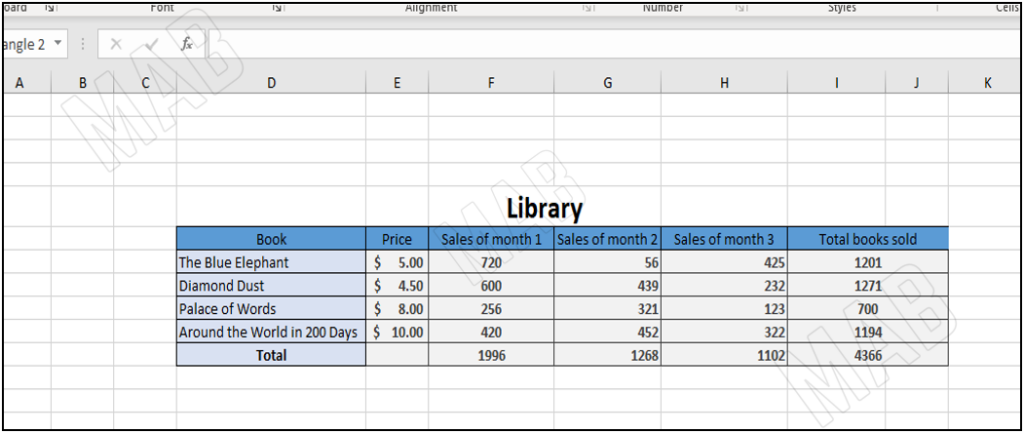
Suppose we want a set of this data to be locked and not changeable by the user.
Protecting cells from being changed in Excel
At the top left corner of the Excel sheet, we find a sign that we click on, and the entire sheet is selected.
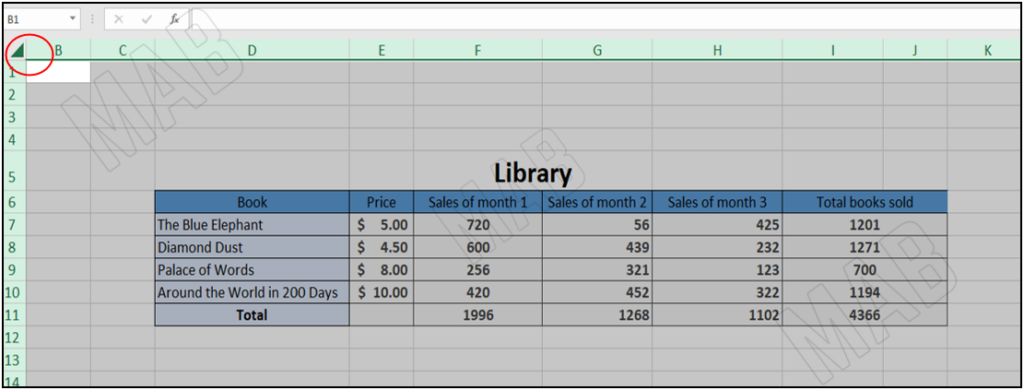
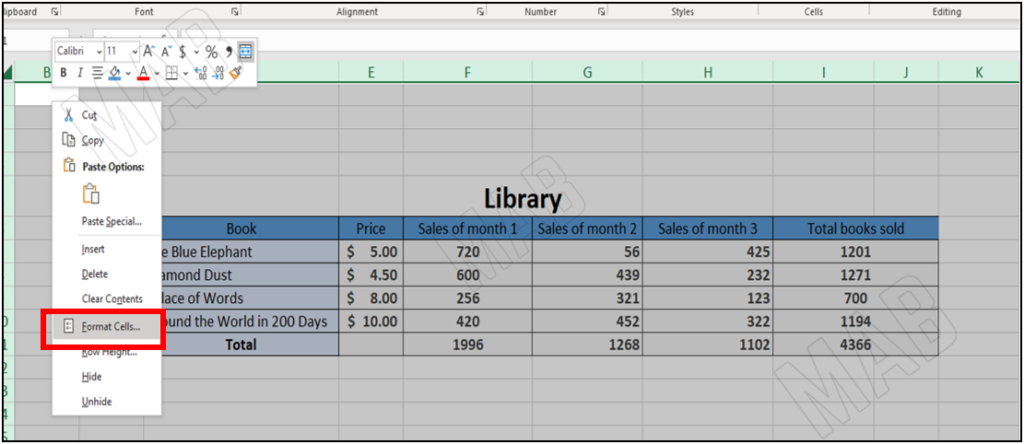
Then we right-click and choose “Format Cells”.
Here a window will appear, so we choose “Protection” from the top of the window, and from there we make sure that the “Locked” option is activated, this option means that the data is locked.
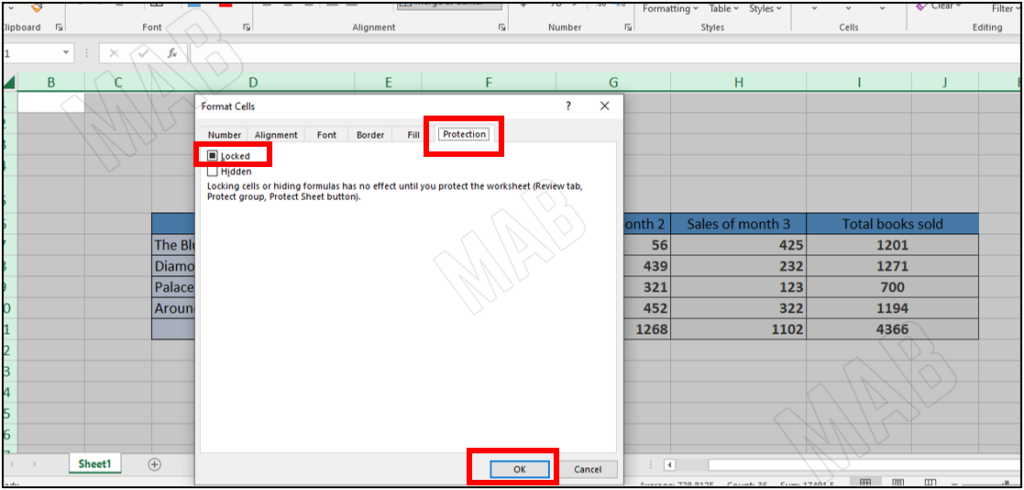
Then we click “Ok”.
Make cells editable in Excel
Then we select the cells that will be open to editing for the user.
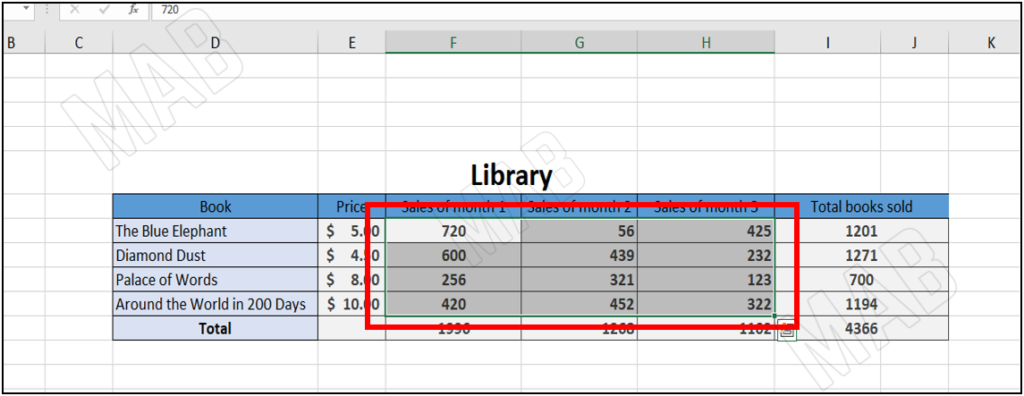
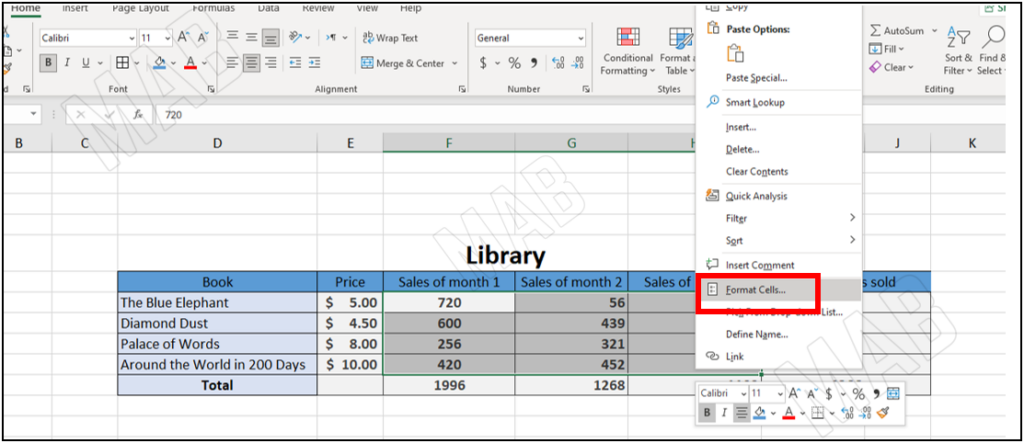
Here we right-click on the selected cells and choose “Format Cells”.
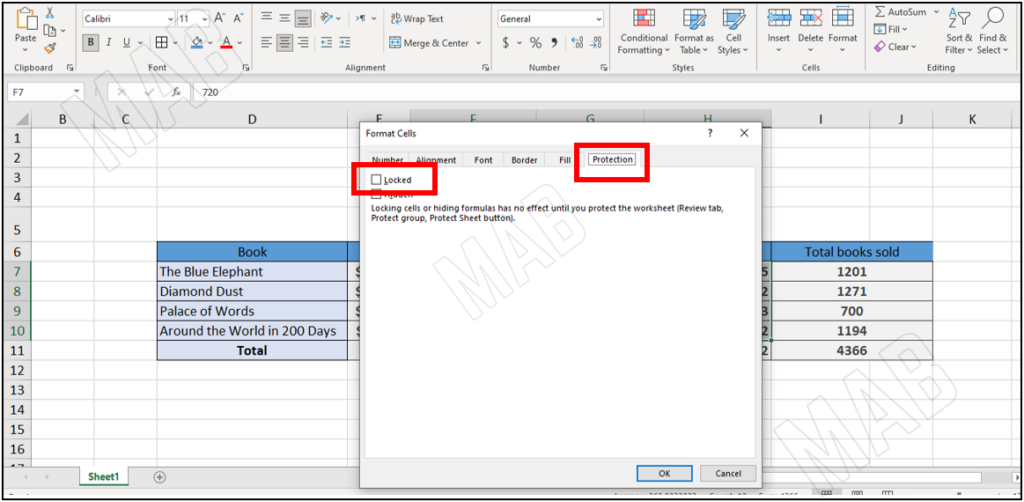
A window will appear, from the top of this window we choose “Protection”, and then deselect the “Locked” option.
We click “Ok”, then from the toolbar, we choose “Review” and from there we choose “Protect Sheet”.
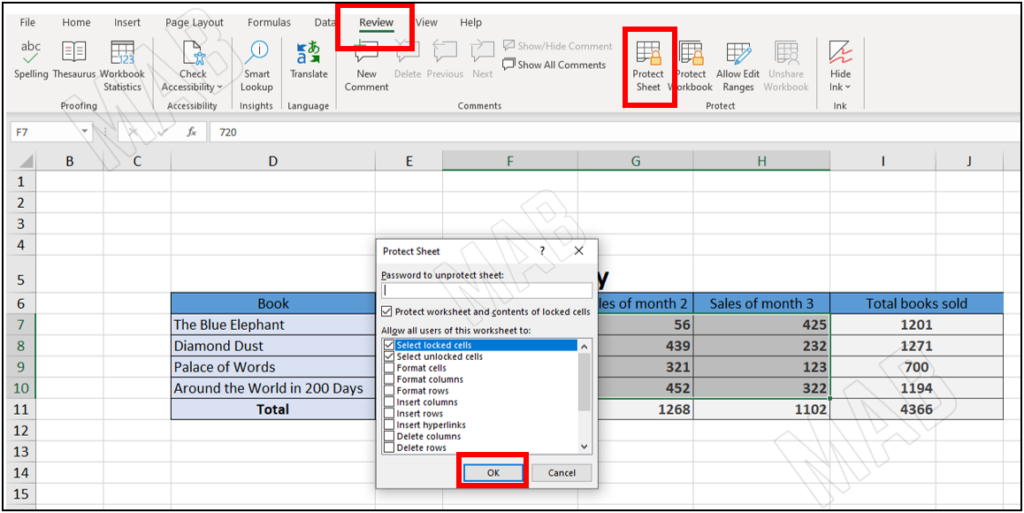
From the “Protect Sheet” window, we notice that we can put a password for the sheet, but in our example, we will leave it as it is and click “Ok”.
Now, if we try to make any changes to the protected cells, we will notice an error notification from Excel.

As for the cells that we have allowed to be changed, they can be changed very simply.

To change the protected cells, we do the following steps:
- First, select the cell that I want to become open to editing.
- Then from the toolbar, we choose “Review”.
- Then we click on “unprotected sheet”.
This makes it possible to edit the cell information.
Dear reader, if you liked the article, do not forget to subscribe to our YouTube channel, which provides all new in the field of technical and completely free training courses.
You can also browse our website to access the blog and read technical topics, or learn about the training courses offered by the site.
To access the full course “Excel Course” on YouTube, click here.


