In this lesson, we will learn about Autofill and its various forms in Excel. In order to clarify the process, we will prepare the following information in Excel.
Methods of repeating writing in more than one cell using the Auto Fill properties
Suppose we have information within a specific cell, and we want to repeat this information in the cells that follow this cell vertically.
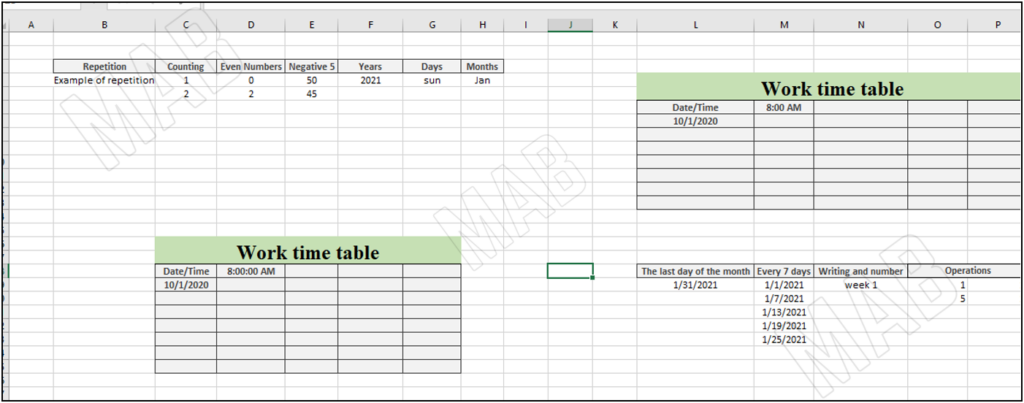
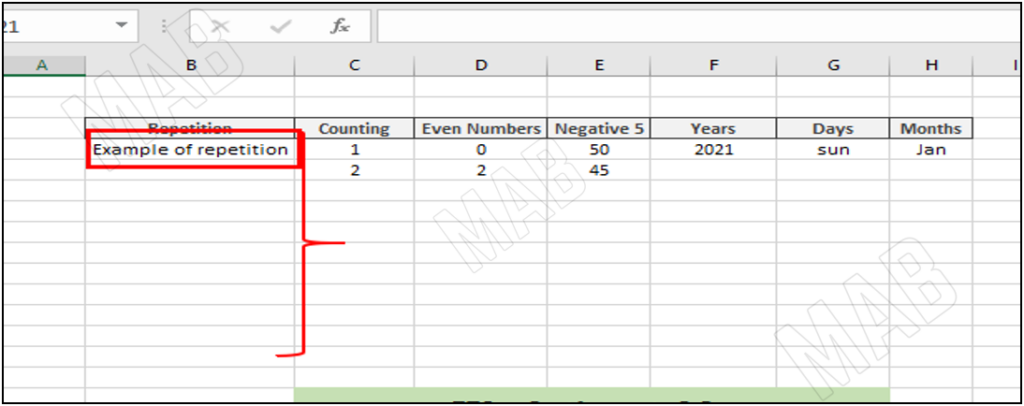
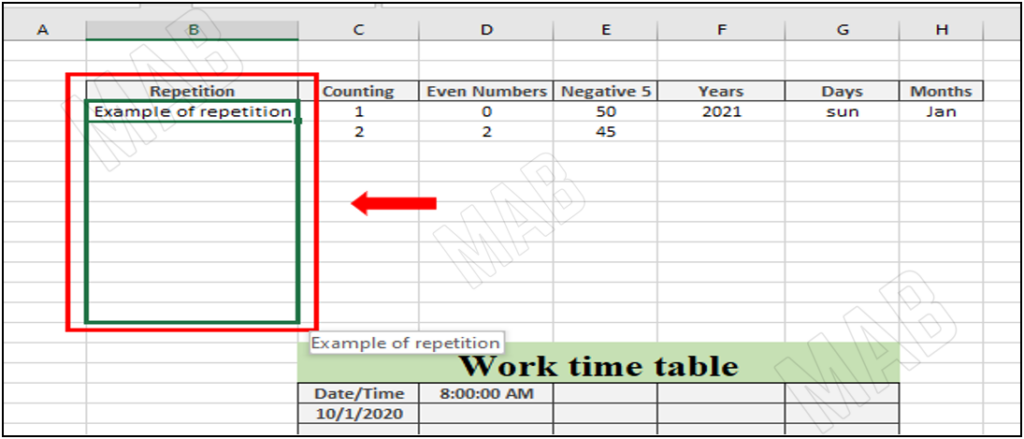
To do this, we select the cells in which we want to repeat the information, by dragging starting choose the corner of the cell whose information we want to repeat towards the cells in which we want to place the result of the repetition.

The result will be as follows:
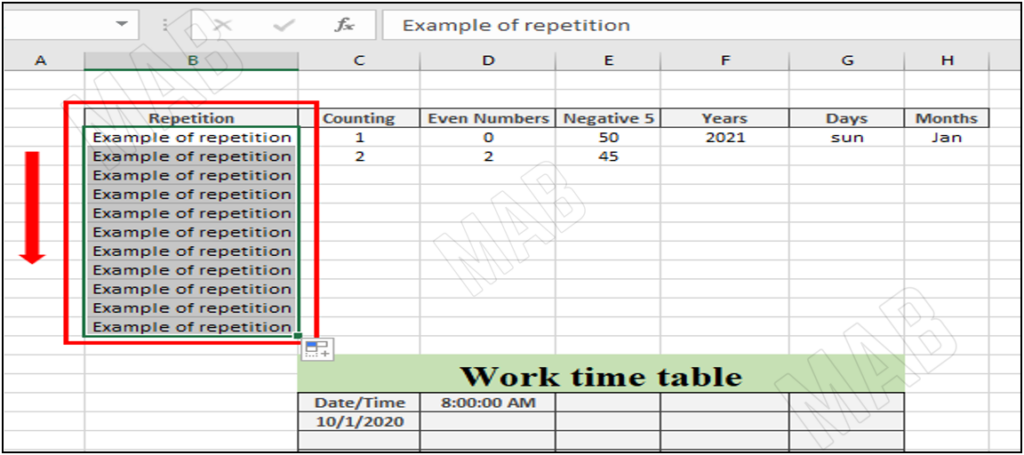
It is important to know that Excel intelligently explores the information we repeat and deduces the repetition pattern we need.
Make Excel Count Ascending Automatically
To make Excel count ascending by one number, it is enough to give it the first two numbers and let it complete the process automatically.
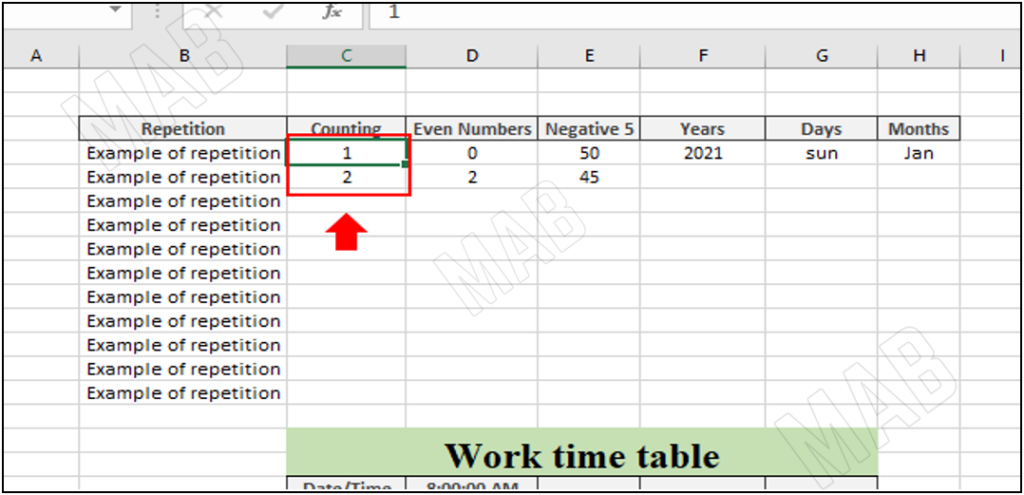
Now we will do a selection and drag process for the cells.
First, we drag the selection of the first cell to the next cell so that Excel can understand the counting pattern that it will follow.
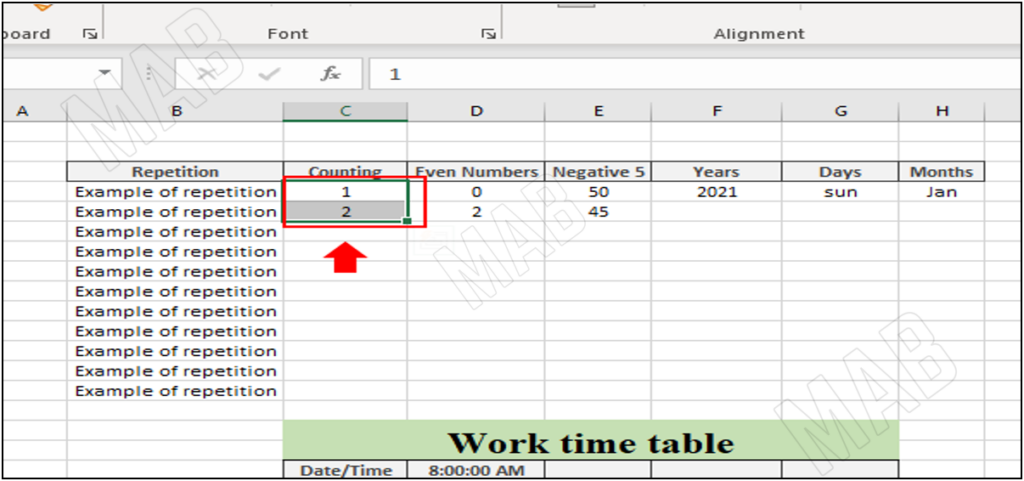
Then we drag and select starting from the corner of the second cell down to the cells that we want to complete the counting process within.
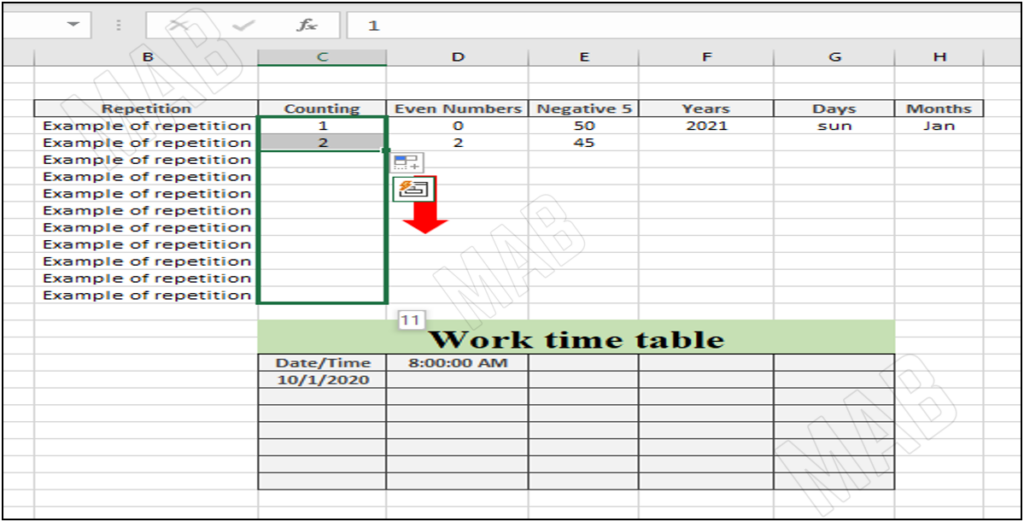
The result will be as follows.
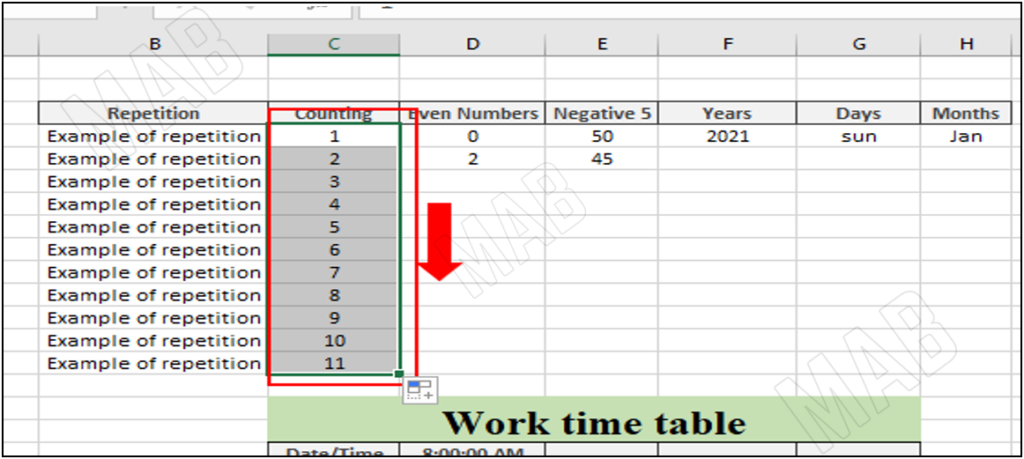
Make Excel count even numbers
To make Excel count a set of even numbers only, we first write the first two even numbers from which it will start counting and then make it automatically complete the counting process.
So to start, we will write the first two even numbers, which will be 0 and 2.
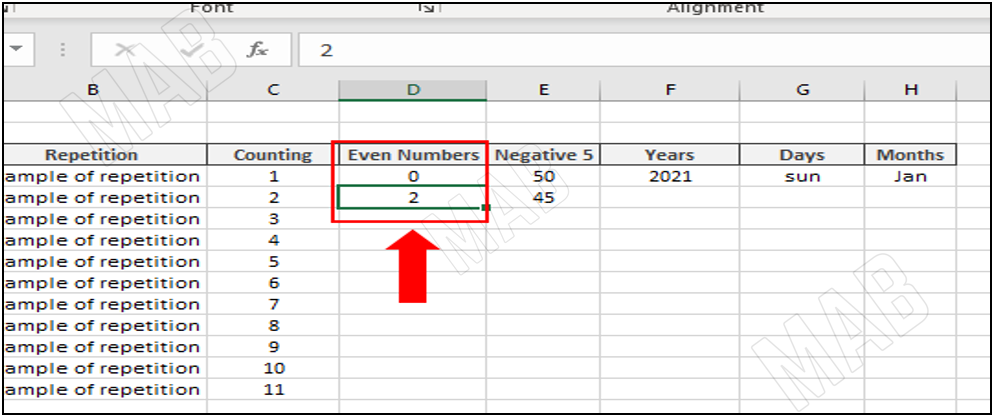
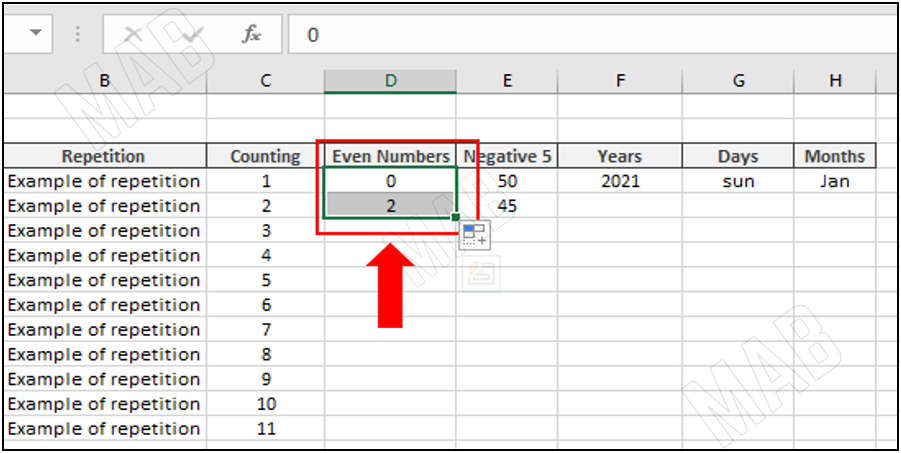
Then we drag the selection of the first cell to the next cell so that Excel can understand the counting pattern that it will follow.
Then we drag and select starting from the corner of the second cell down to the cells that we want to complete the counting process within.
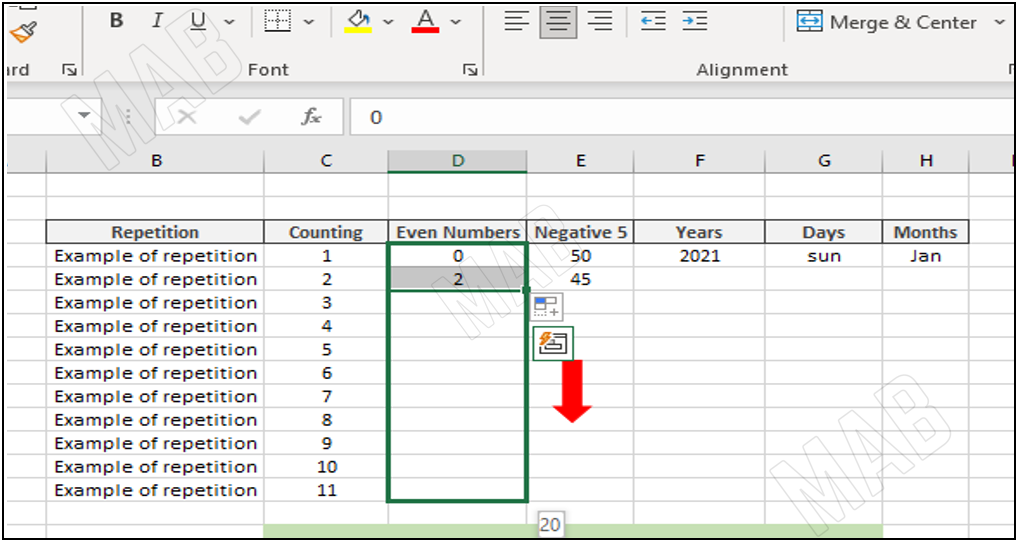
The result will be as follows.
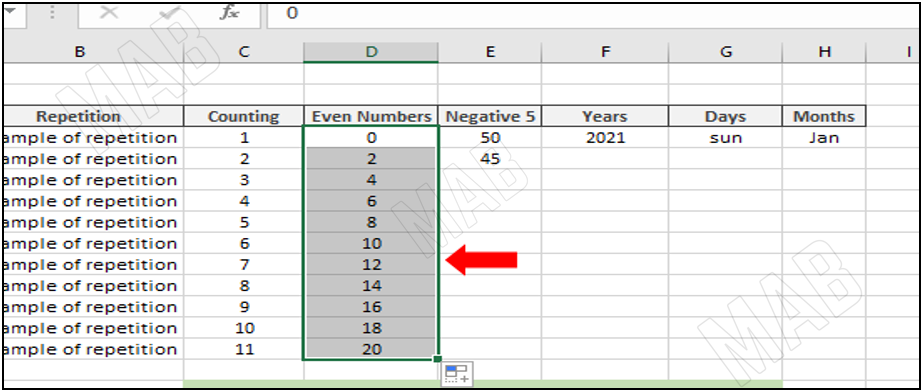
Make Excel count down by a certain number using Auto Fill
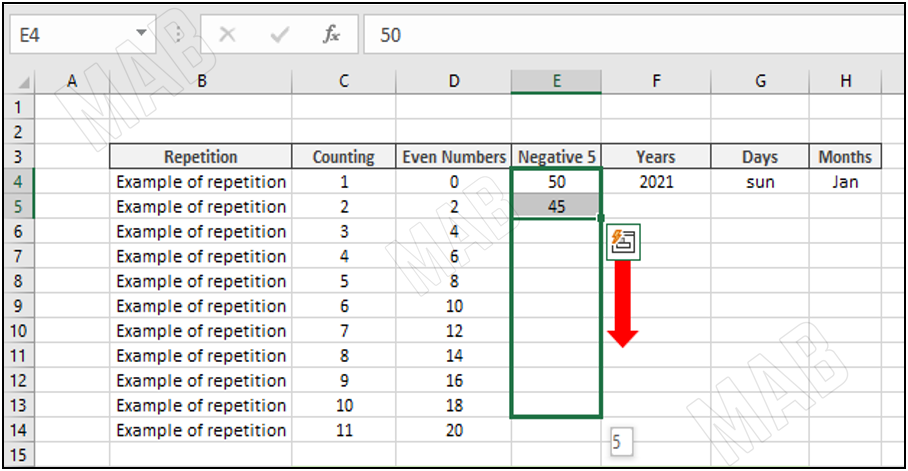
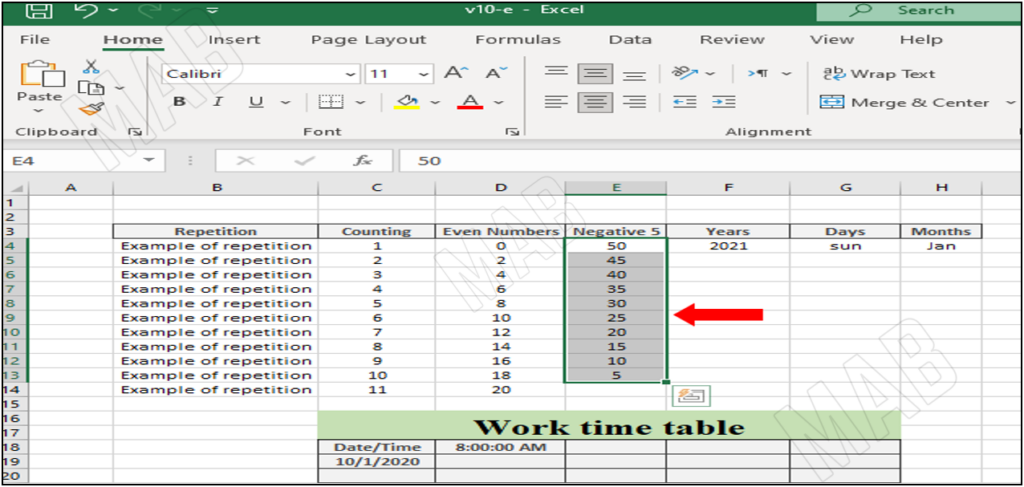
Now we will make Excel count down by 5, so we will write the first two numbers so that Excel recognizes the counting pattern and then completes the process automatically.
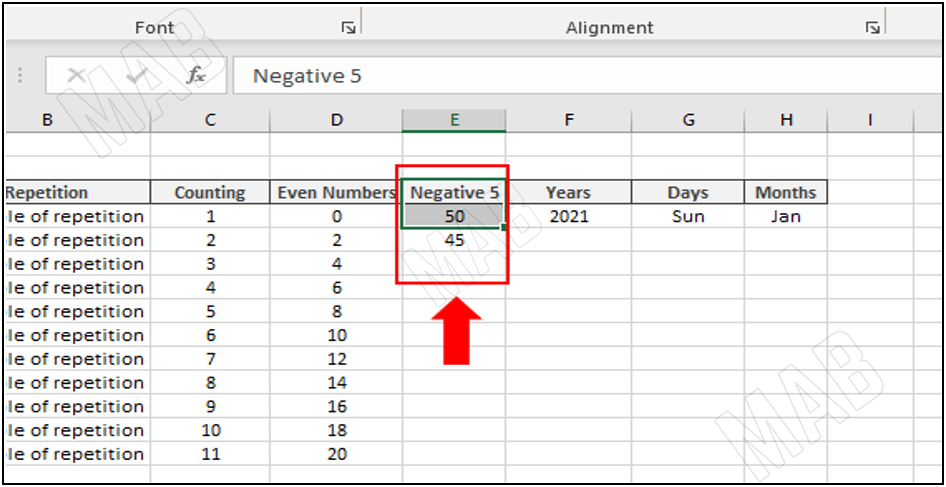
To start, we drag the selection of the first cell to the next cell so that Excel can recognize the counting pattern that it will follow.
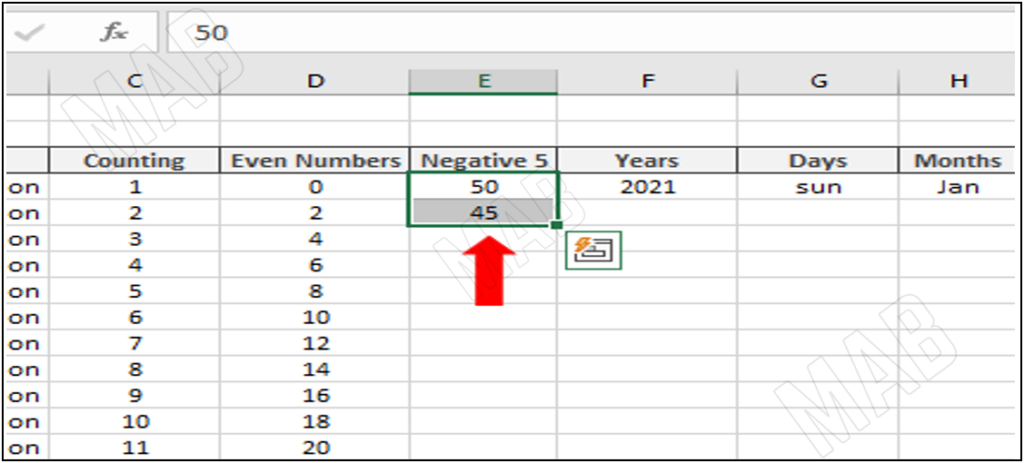
Then we drag and select starting from the corner of the second cell down to the cells that we want to complete the counting process within.
The result is as follows.
Make Excel count the years by auto-filling
To do this, we first write in one of the cells the year from which we will start counting.
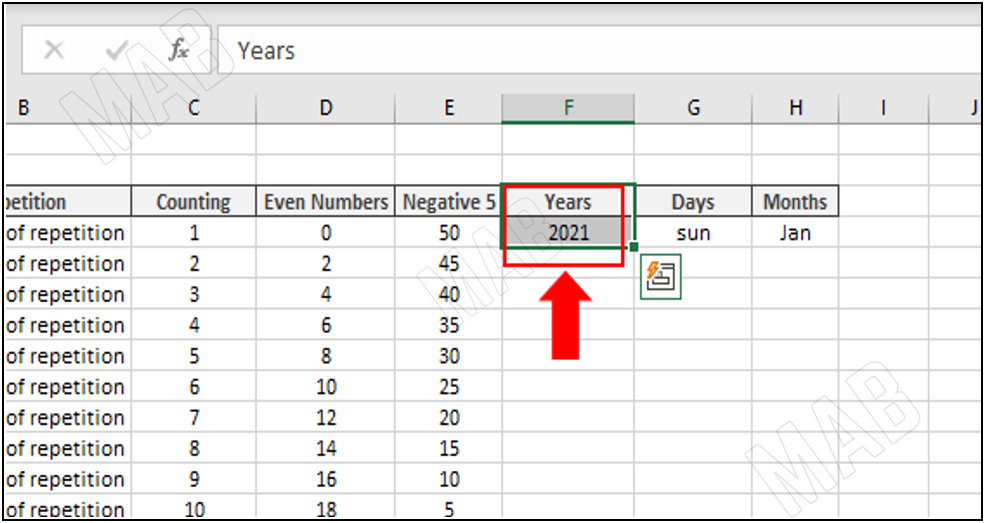
Then we will drag and select starting from the corner of the resulting cell down to the cells in which we want the counting process to be done.
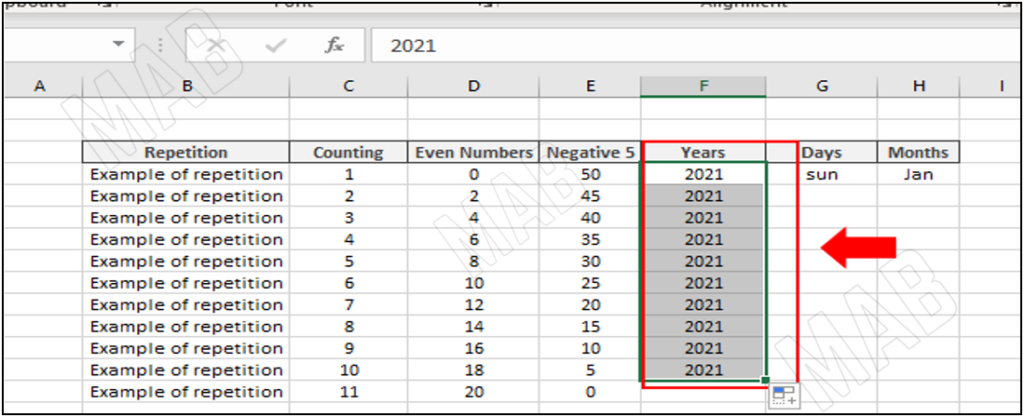
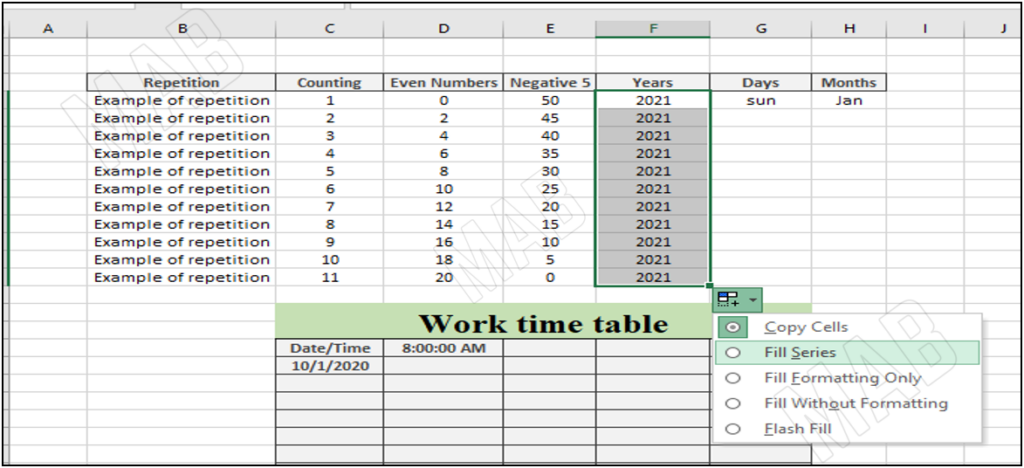
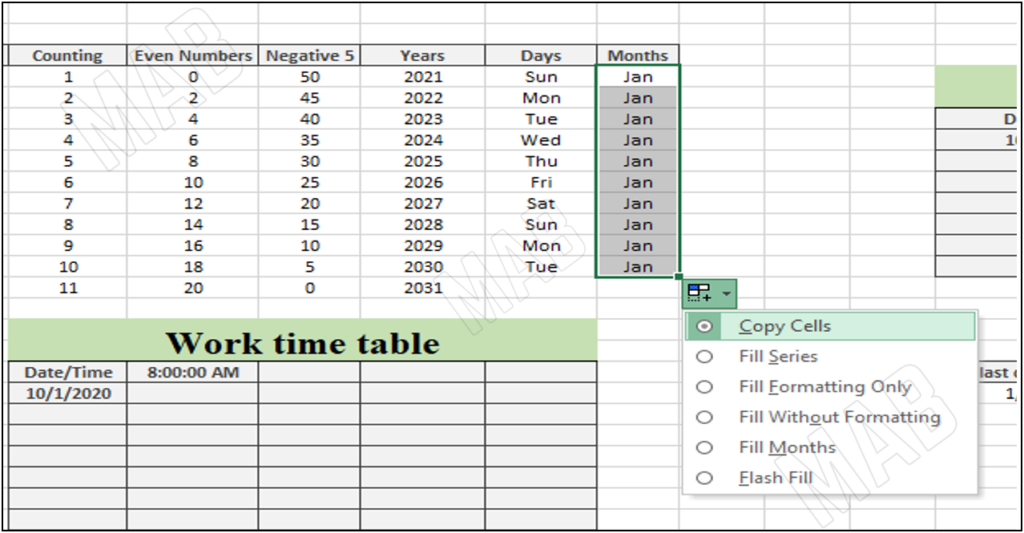
We notice that Excel has copied the number to all the cells, now to modify the copying process to a counting process, we notice a mark in the last cell and click on it.
We notice a group of options, to change the copying process to a counting process, we click on the “Fill Series” option.
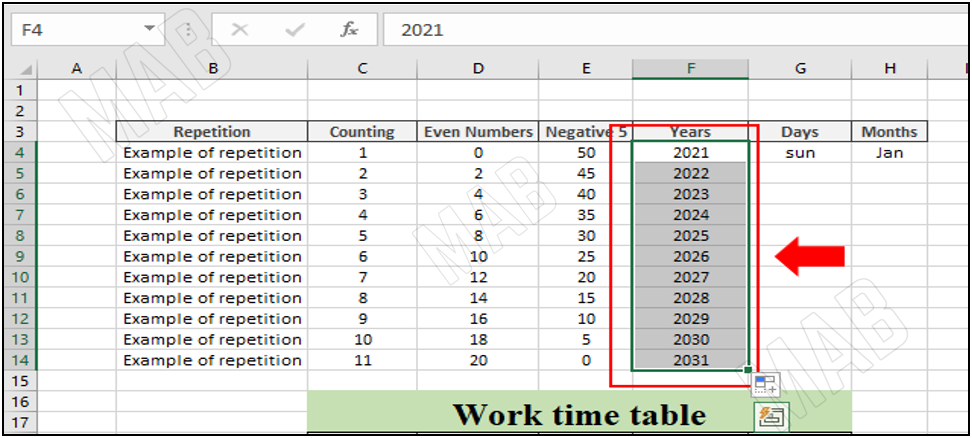
The result will be as follows.
Make Excel count the days of the week
To do this process, we must first write one of the week days in a cell, which is the day from which we will make Excel count.
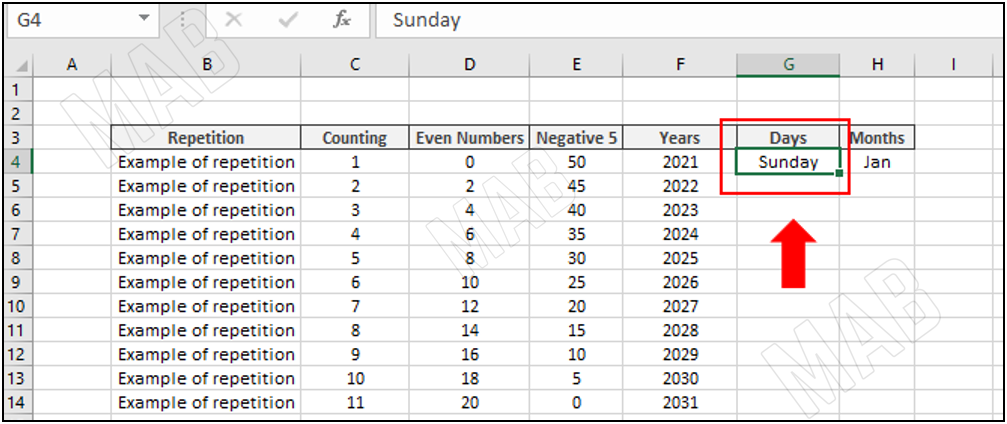
Then we will select the cell that contains this day.
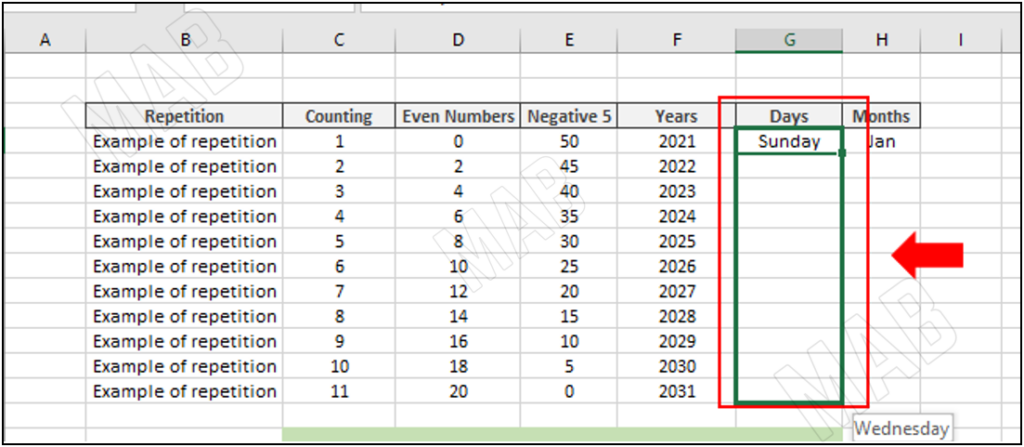
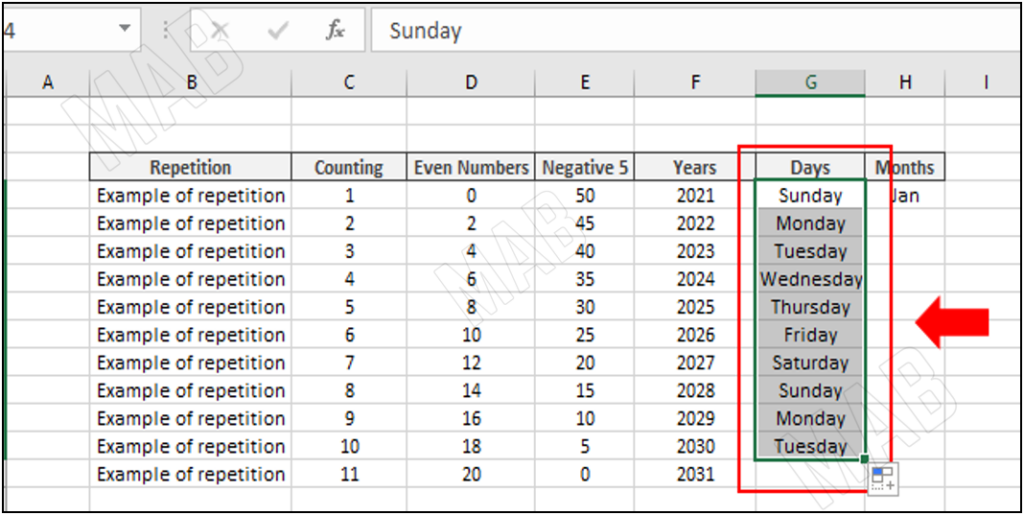
After that, we drag and select starting from the corner of the cell down to the cells in which we will put the days of the week that will come after it.
The result will be as follows.
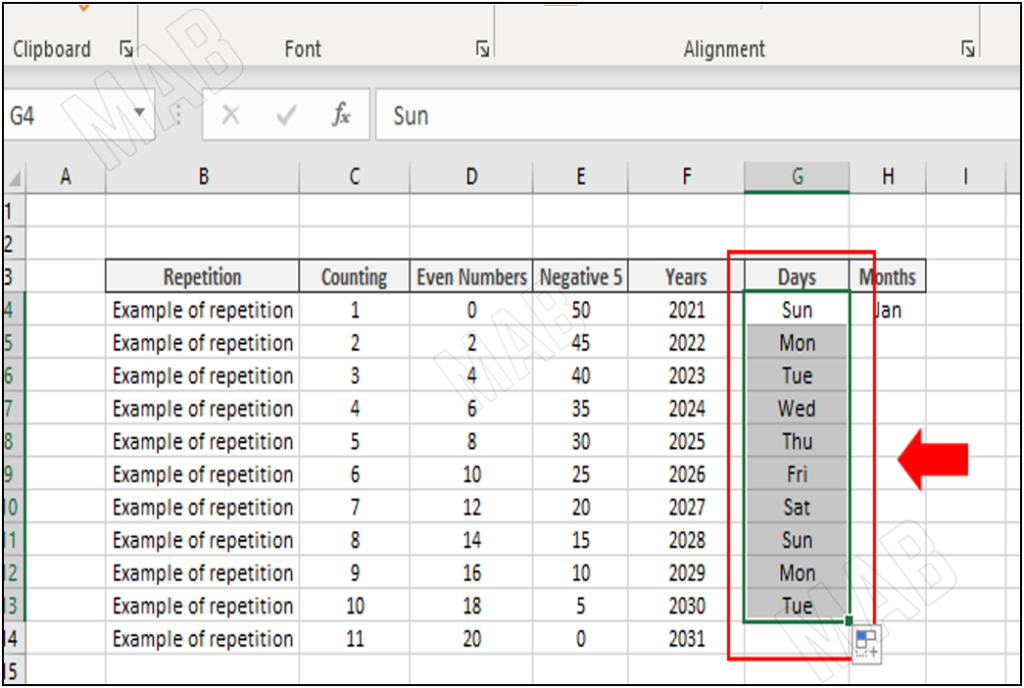
Now to do the same process, but assuming that we want to write the days of the week as abbreviations, here we will repeat the same previous process in detail, but we will write the first day in an abbreviated way.
That is, instead of writing Sunday, we will write Sun, and the result will be as follows.
Make Excel count the months using Autofill
To do this process, we must first write one of the months in a cell, which is the month that we will make Excel count from.
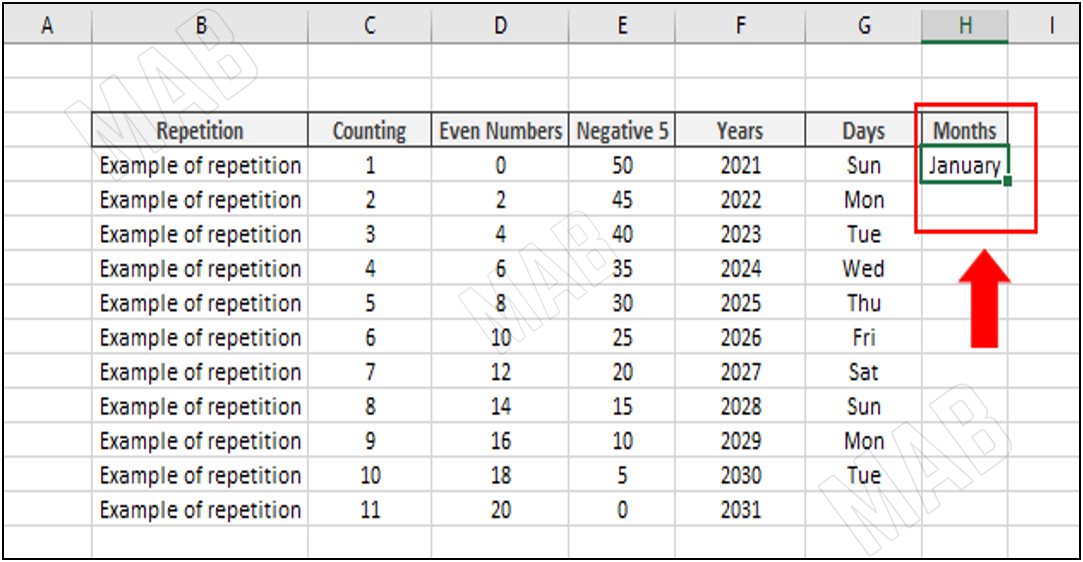
Then we will select the cell that contains this month.
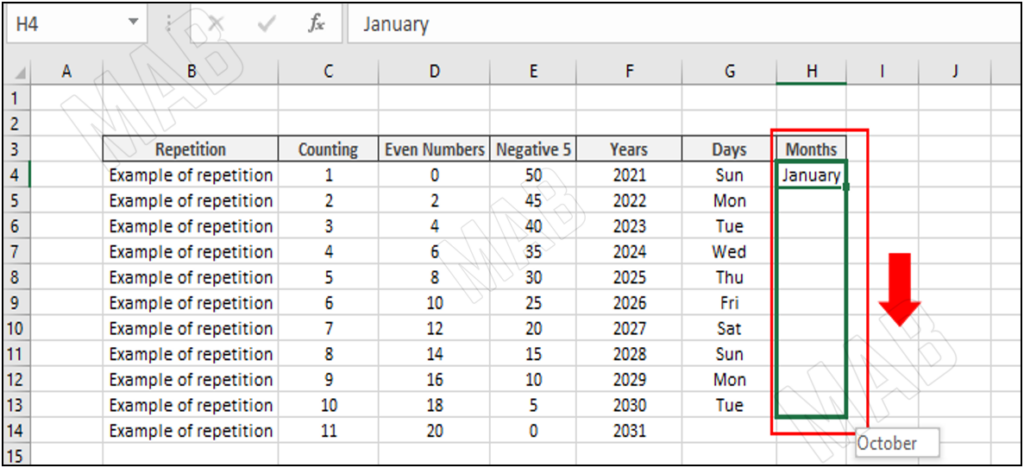
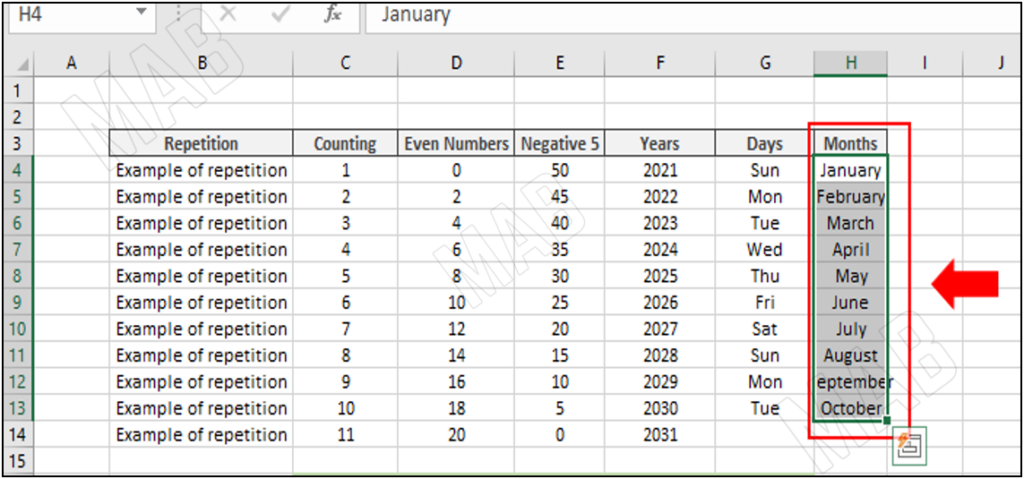
After that, we drag and select starting from the corner of the cell down to the cells in which we will put the days of the months that we will count.
The result will be as follows.
Now to do the same process, but assuming that we want to write the months as abbreviations, here we will repeat the same previous process in detail, but we will write the first day in an abbreviated way.
That is, instead of writing January, we will write Jan, and the result will be as follows.
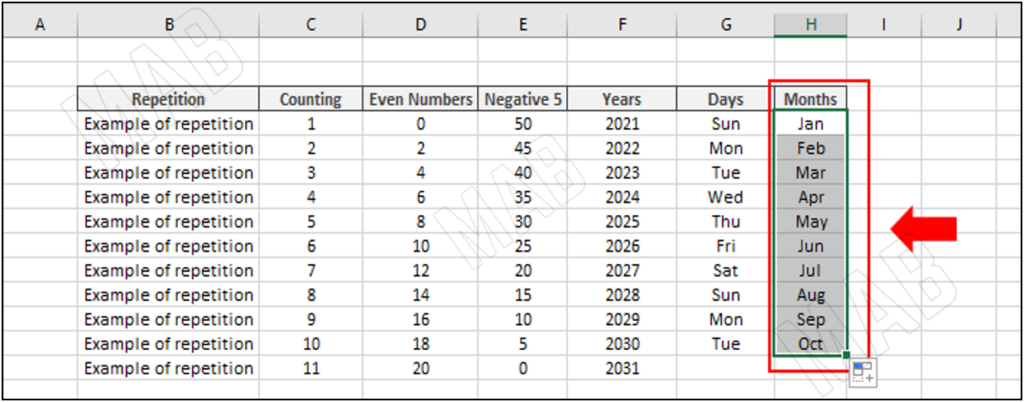
To switch from the counting process to the copying process, we click on the mark in the last cell and then choose the “Copy” option, and we will notice that the process changes to copying “Jan” in all cells.
Using Excel to format a work time table
Formatting a work time table in Excel
Let’s have the work time table shown in the picture and we want to format it in the fastest way possible.
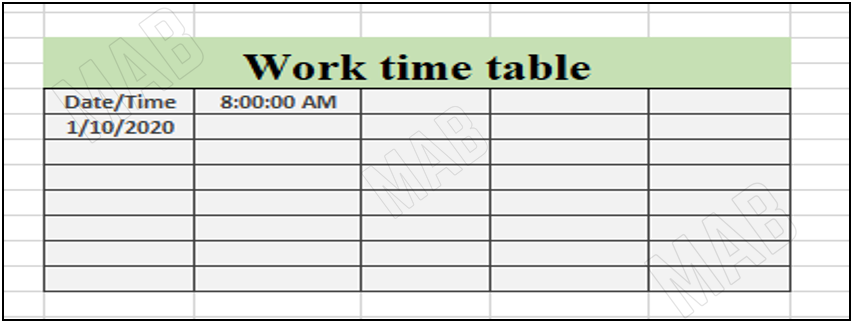
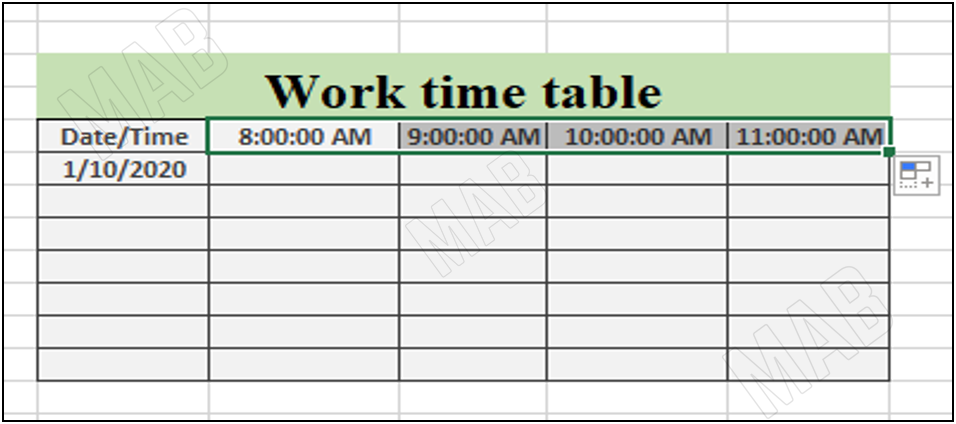
First, one of the features of auto-fill is that Excel completes the cells when the content is related to hours and will count by default by one hour.
If we select the cell that contains the hour and drag towards the adjacent cells, we will find that each adjacent cell has an increase of one hour from the previous cell.
Formatting a date table in Excel using Autofill
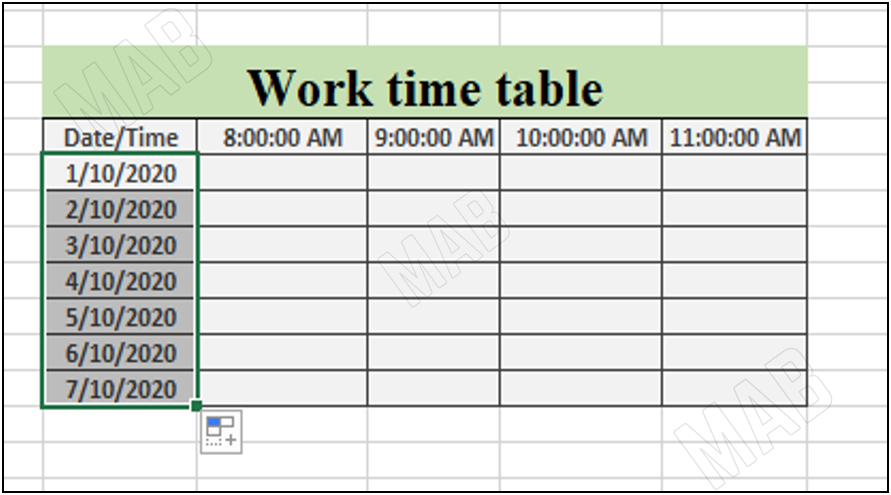
The same applies to the date. If we select the cell that contains the date and then drag to the cells that follow, we will find that each cell represents the date following the date in the previous cell with a difference of one extra day.
Autofill Date in Excel by one month
Now, suppose we want to implement a plan for the month and suppose we have the following table:
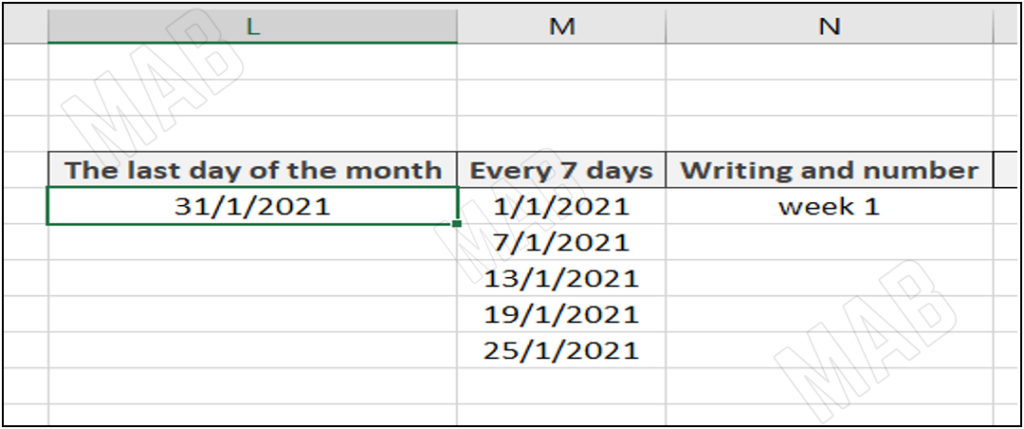
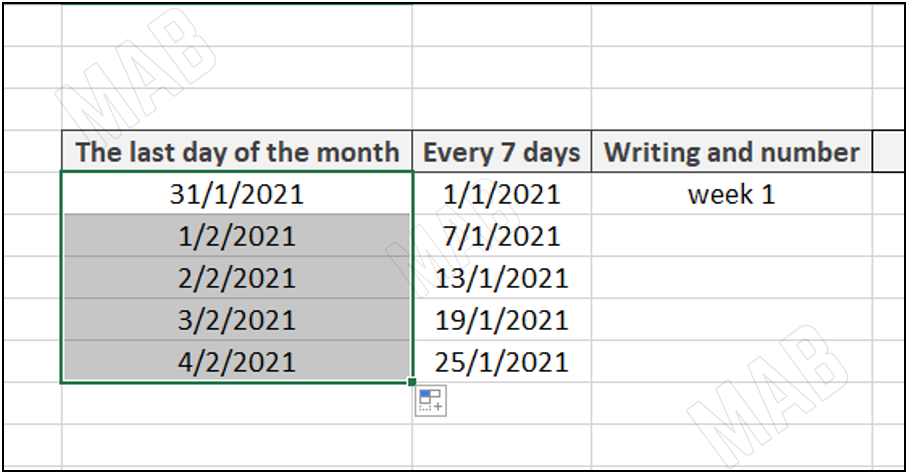
We have the column “Last day of the month”, suppose we select and drag from the cell downwards, Excel will form a column in which each cell is an increase of the previous cell by one day.
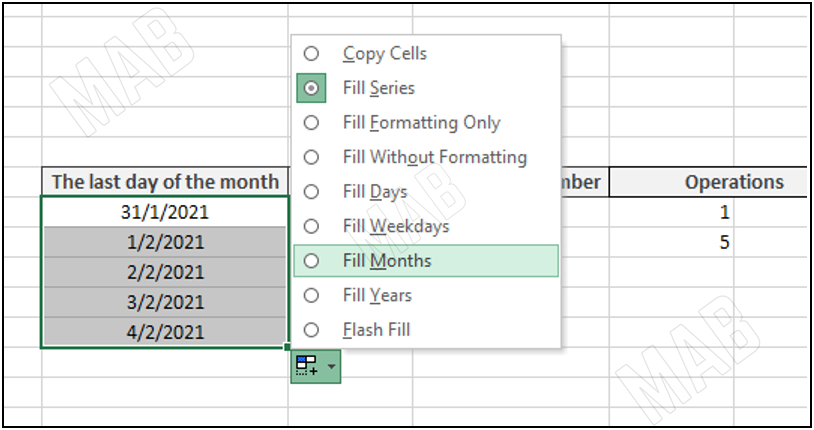
To change the counting plan to a year or a month, we first click on the box shown below and then choose “Fill Months”.
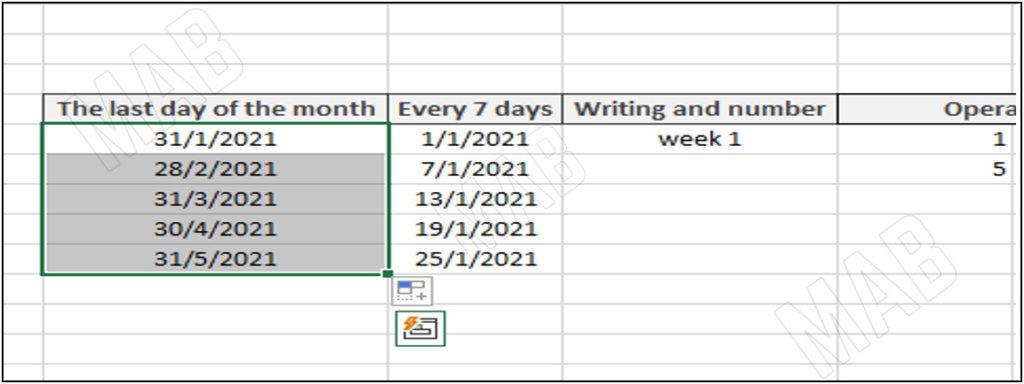
We get the following result, which expresses a group of cells, each cell is an increase of the previous cell by one month.
Increase the date in Excel by seven days
Suppose I want to increase the date by seven days, and suppose we have the following table:
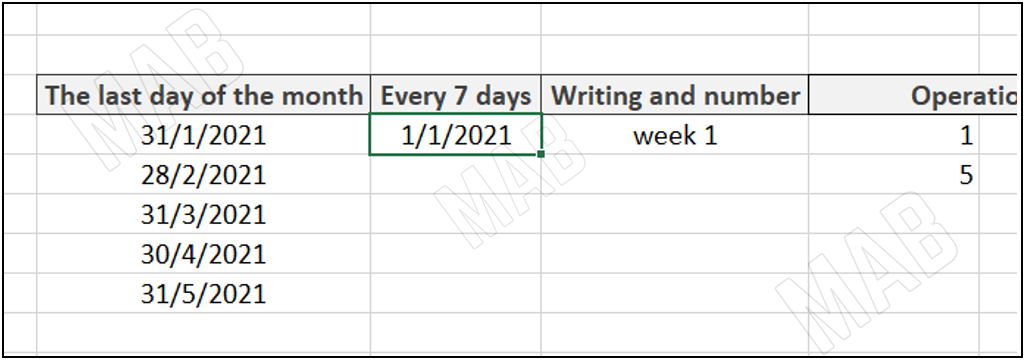
If we select the cell containing the date and then drag downwards, the date will be increased by one day.
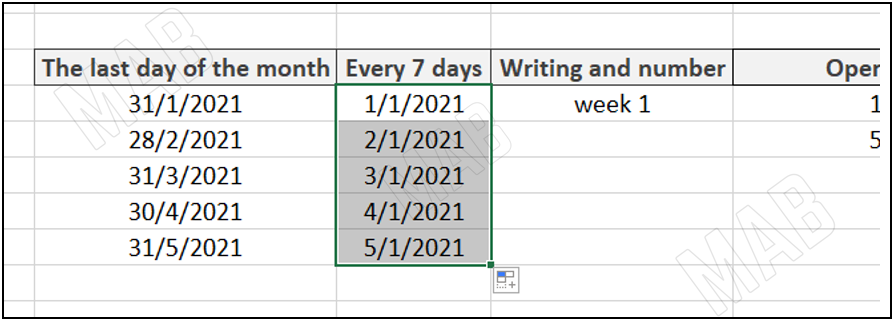
If we want to increase the date by a week, we will first write the next required date in the next cell, and thus we will inform Excel of the required counting pattern.
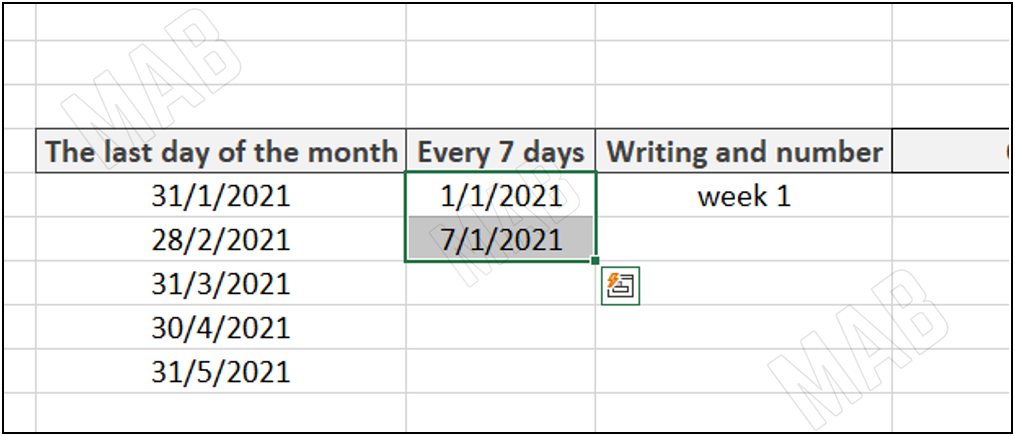
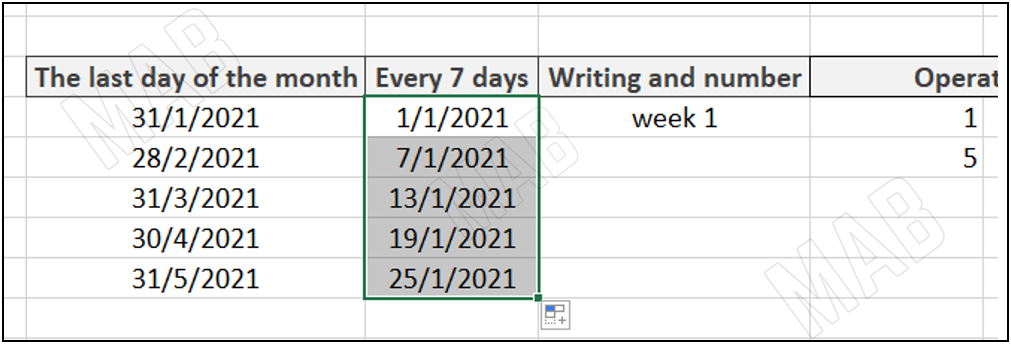
Then we select the two cells and drag downwards, and the required result appears, which is an increase of the date by seven days each time.
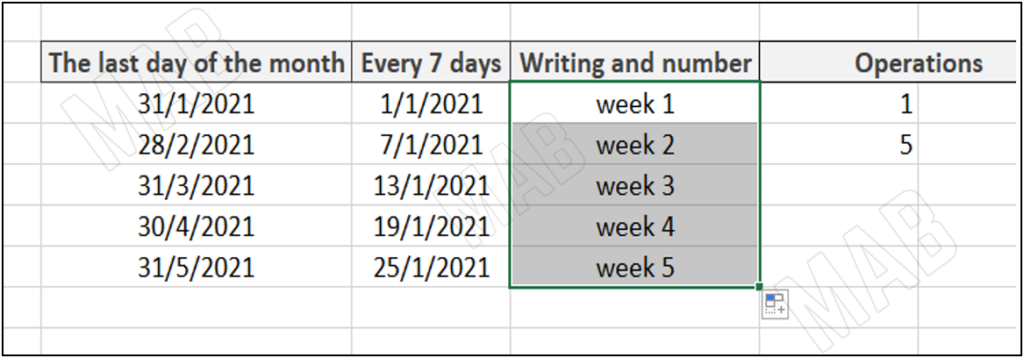
Autofill in Excel by fixing the writing and modifying the number
Suppose we have the following table.

In order to fix the writing and modify the number, we will first select the cell “Week 1” and then we will drag it down to get the desired result.
Autofill in Excel for a Mathematical Operation
To clarify the idea, we have the following data in Excel:
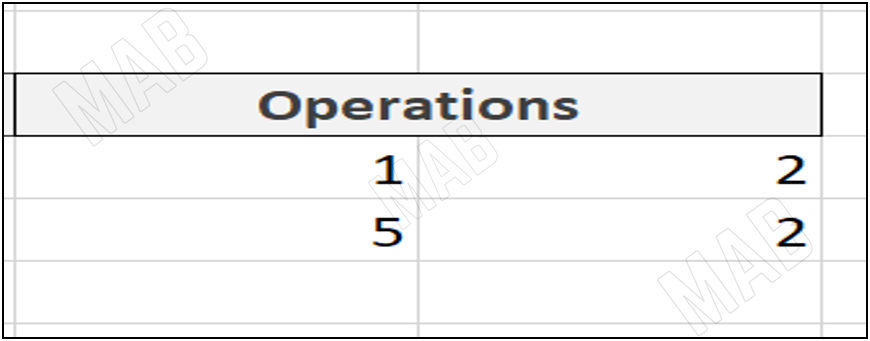
Suppose we want to perform a mathematical operation such as addition, and we want to apply this operation to all data without performing the operation every time, then autofill will undoubtedly help us.
- First, we apply the addition operation to the first line, through the following steps:
- First, select the cell in which we will put the result of the addition operation.
- Second, we write the “=” sign in this cell.
- After that, we select the first cell.
- Then we write the operation symbol “+”.
- We also select the second cell.
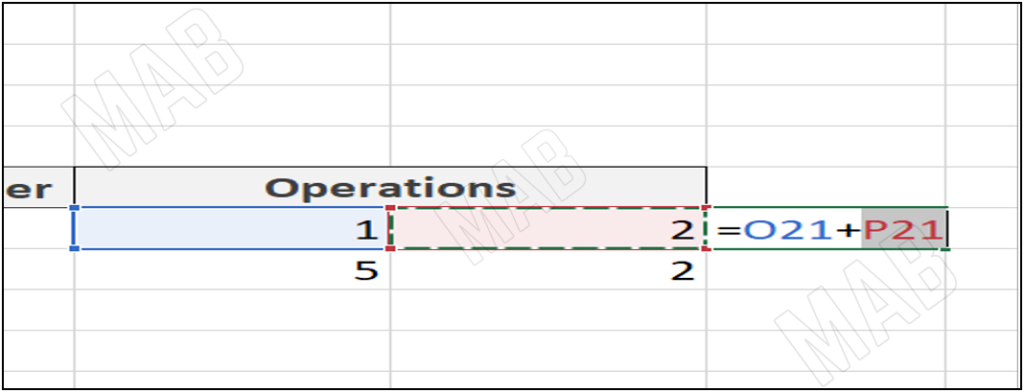
Then we press “Enter”.
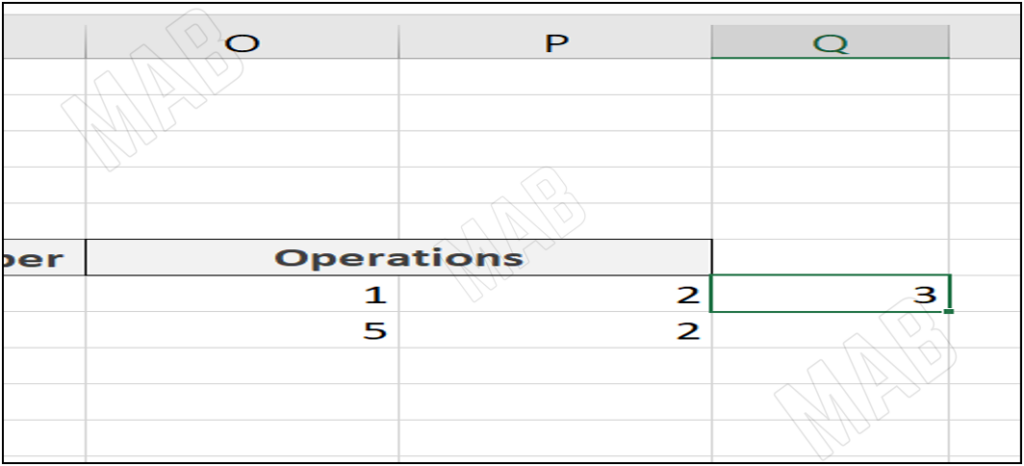
To apply the operation to the following data, we select the cell in which we put the result of the addition operation, and then we drag down, and we notice that the addition operation was done on the second line as well.

Using Autofill in Excel for Date (Day, Month, Year), Hours, Days, and various processes to shorten the manual filling time.
Dear reader, if you liked the article, do not forget to subscribe to our YouTube channel, which provides all new in the field of technical and completely free training courses.
You can also browse our website to access the blog and read technical topics, or learn about the training courses offered by the site.
To access the full course “Excel Course” on YouTube, click here.


