In this lesson, we will learn more than one way to attach file in Excel.
We have two ways to attach files in Excel:
1- The first way: Attach the file with the file icon and its name.
2- The second way: Attach the file with a basic image of the content, and when you click on it, the file will open.
We can use these methods to attach inside Excel: Word, Excel, PDF, PowerPoint, and other files.
Application:
Attach a “PDF” file according to the first method with a special image of the file
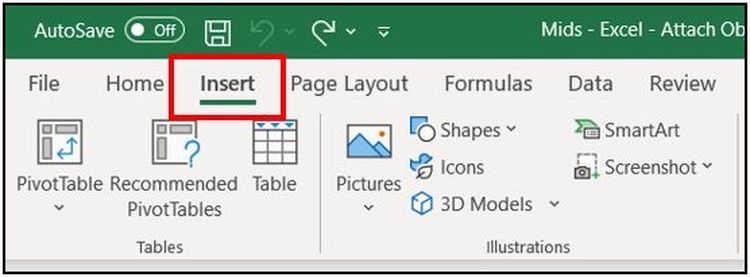
1- First, from the toolbar we choose “Insert”.
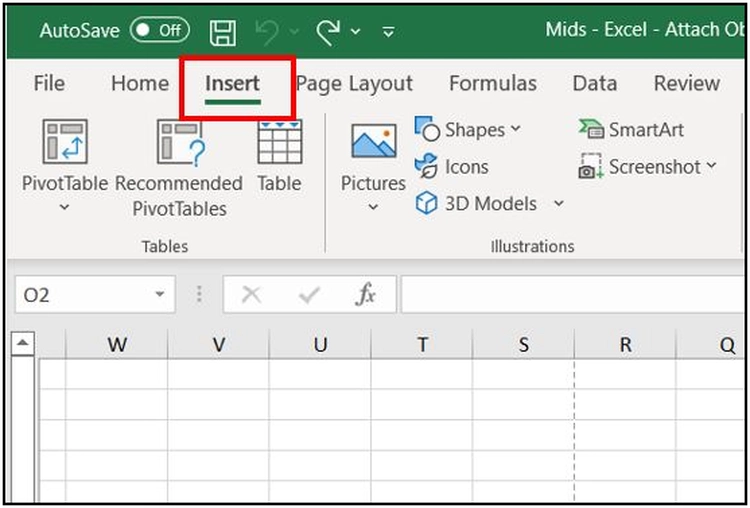
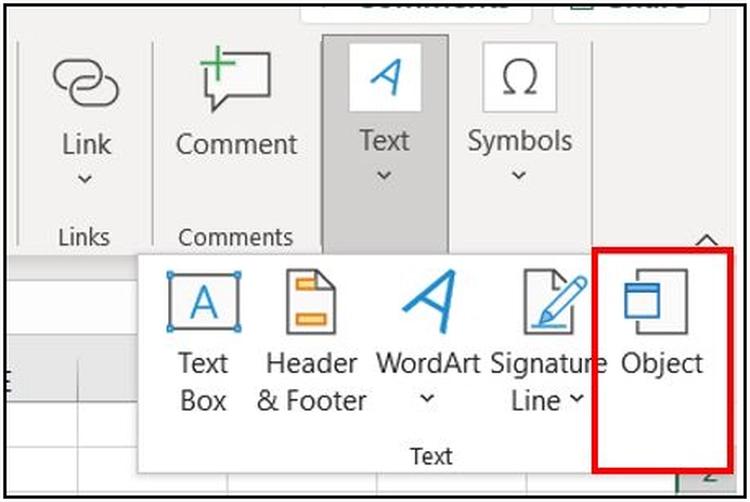
2- Second, from “Text” we choose “Object”.
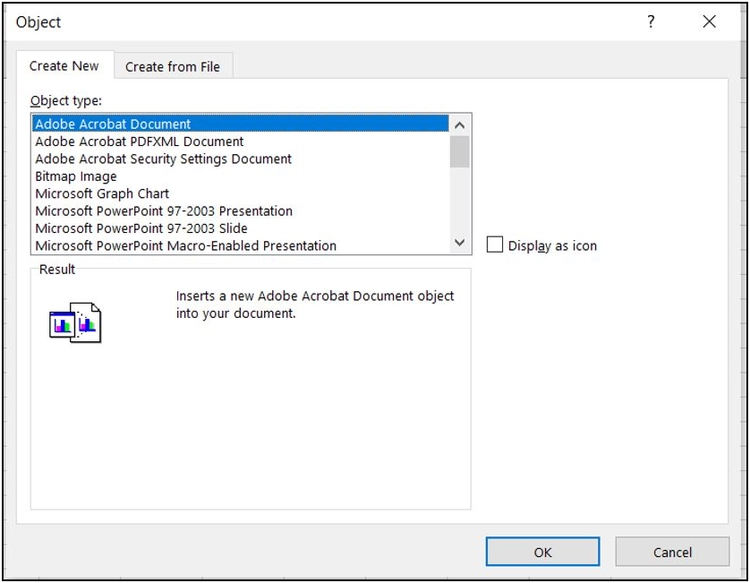
3- As we notice in the list that appears, there are all available options “Word, PowerPoint,…”. We must also know that the “PDF” option is not present in this list.
4- To choose a “PDF” file, we will choose “Create From File” from the top.
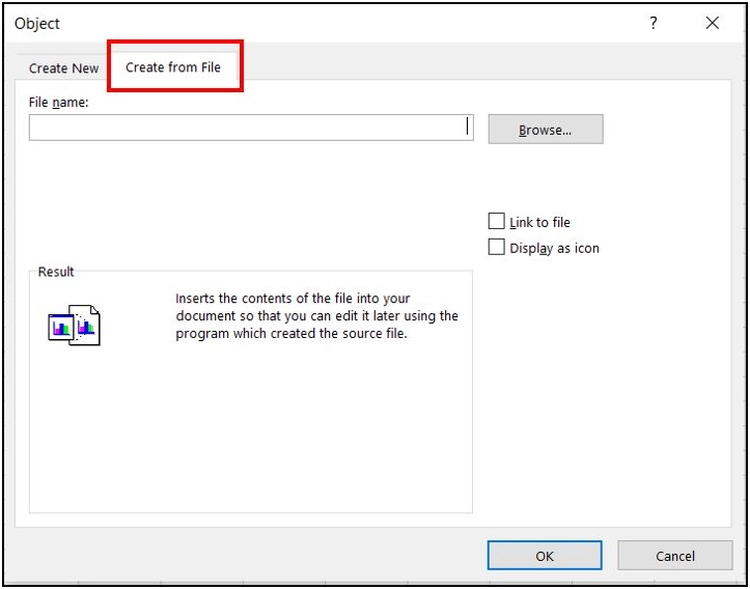
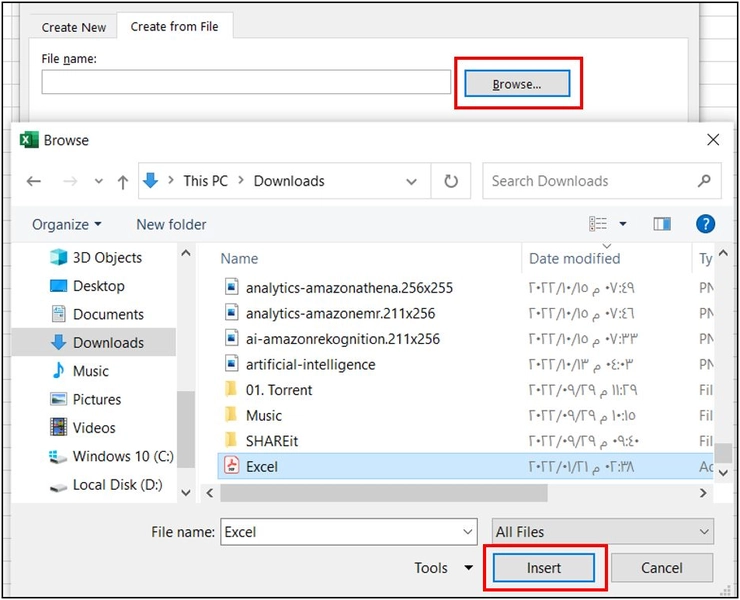
5- To choose a “PDF” file, we click on “Brows” and then choose the file we want, then choose “Insert”.
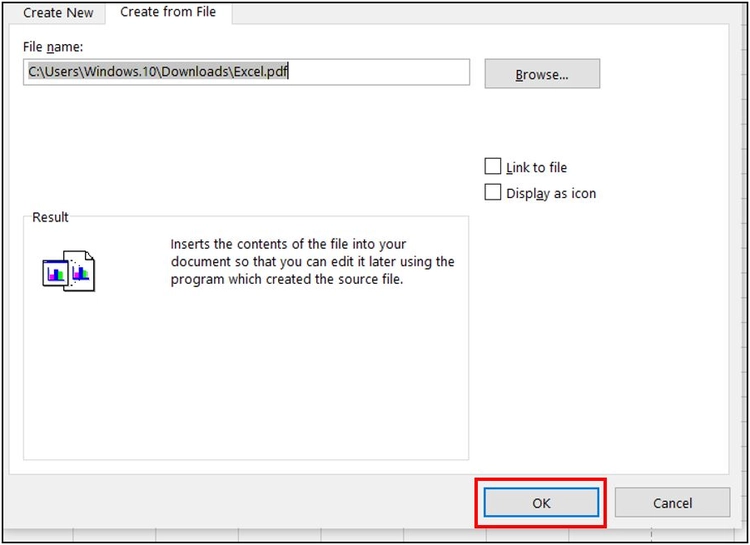
6- After that we choose “Ok”.
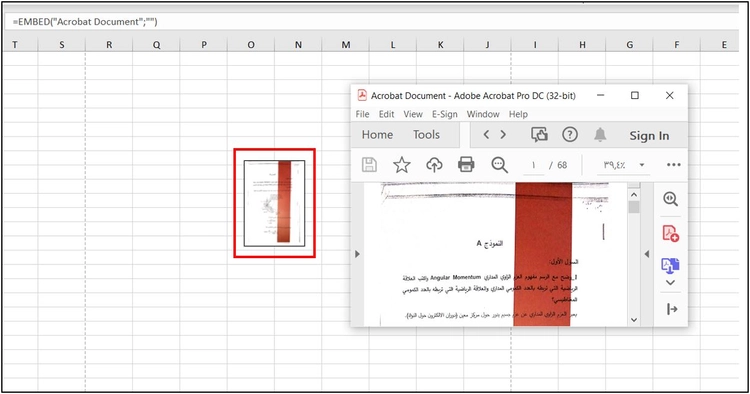
7- Then an image appears, which is usually the image of the first page of the file. When you click on this image, the attached “PDF” file will open.
Attaching an “Excel” file according to the first method with the file icon displayed
1- First, from the toolbar, we choose “Insert”.
2- Then from “Text”, we choose “Object”.
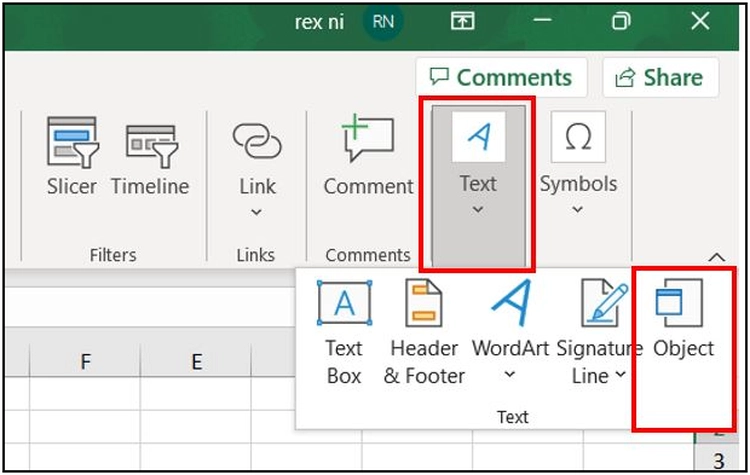
3- As we notice in the list that appears, there are all the available options “Word, PowerPoint,…”. We must also know that the “PDF” option is not present in this list.
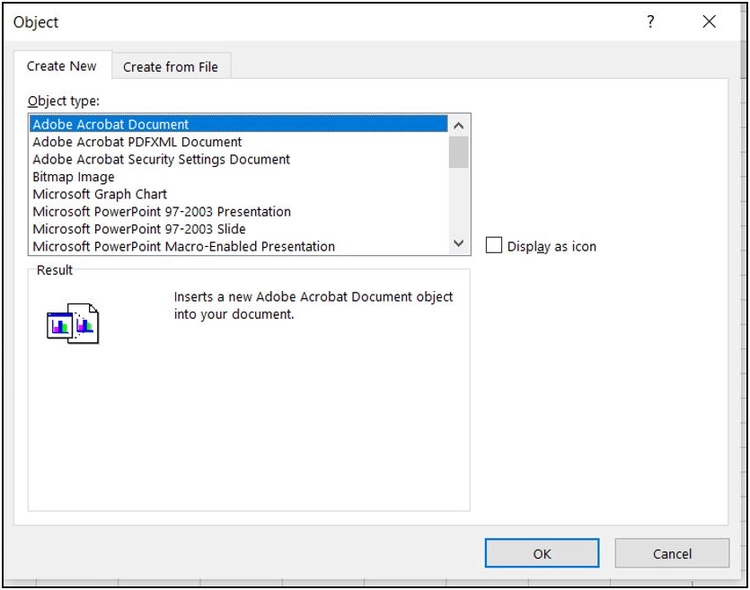
4- To choose the “Excel” file, we will choose “Create From File” from the top.

5- After that, “Browse”, we choose the name of the file we want, and then we choose “Insert”.
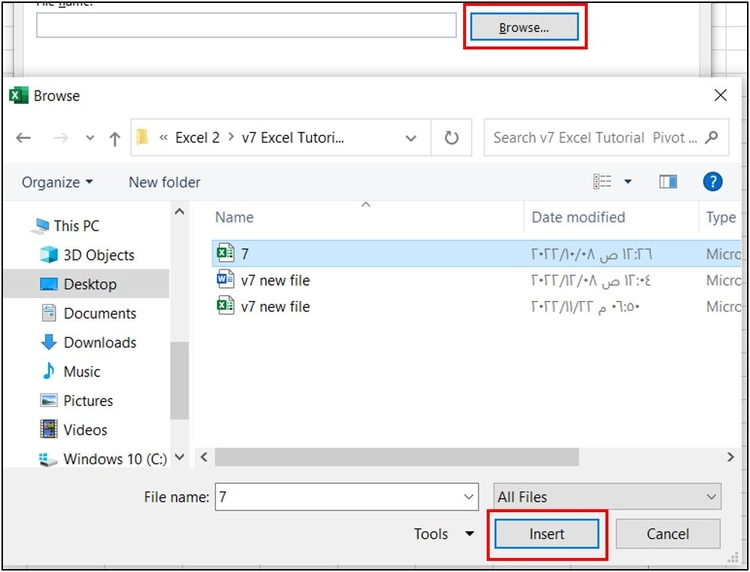
6- To display the icon for the file instead of the image, we choose “Display as icon”.
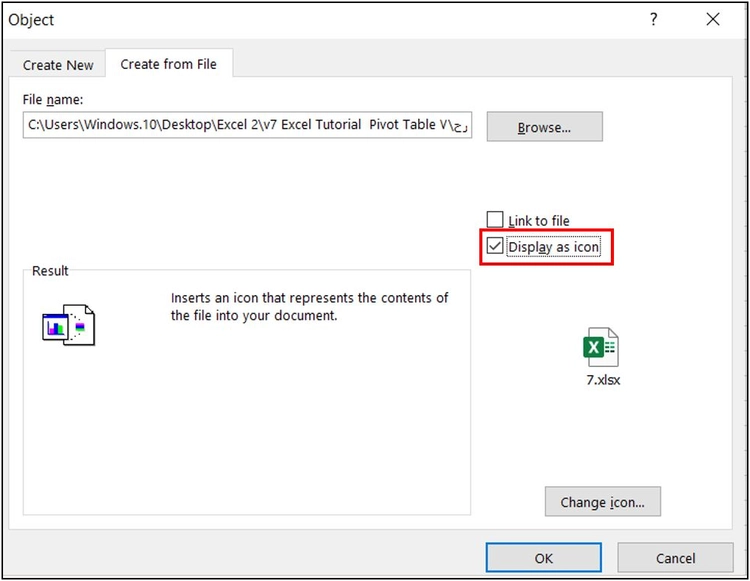
7- Then we choose “OK”. Now we notice the file appearing with its icon, and if we click on the icon, the attached file opens.
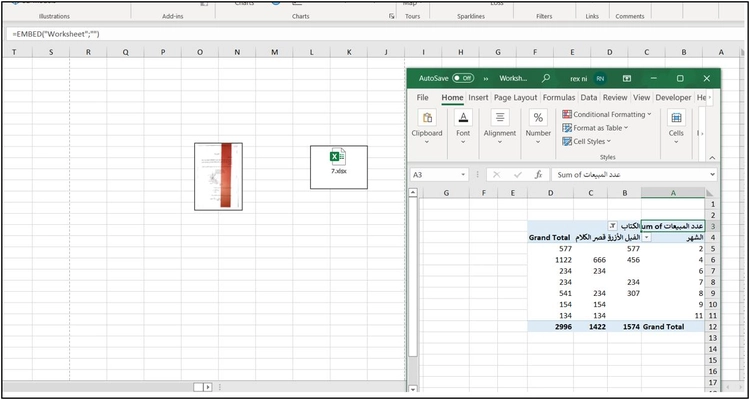
Insert an Excel file according to the second method with the image displayed
1- First, from the toolbar, we choose “Insert”.

2- Then from “Text” we choose “Object”.

3- As we notice in the list that appears, there are all the available options “Word, PowerPoint,…”.
4- We choose from the top “Create From File”.
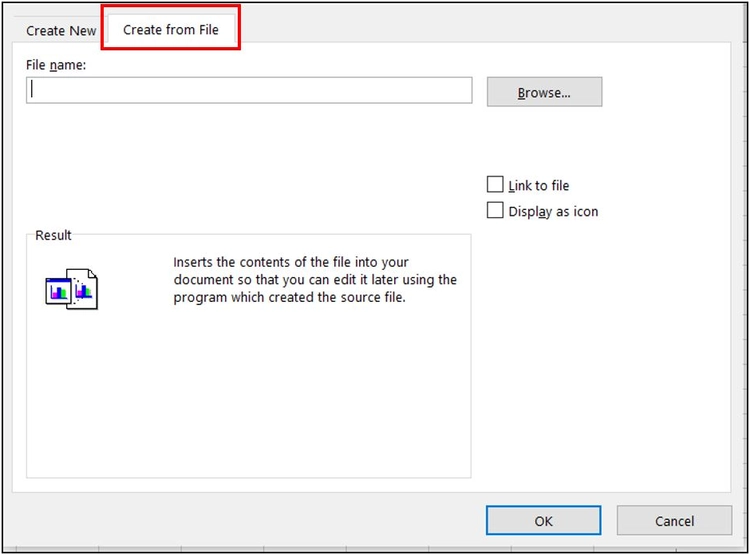
5- Then from “Brows” we choose the name of the file we want and then choose “Insert”.
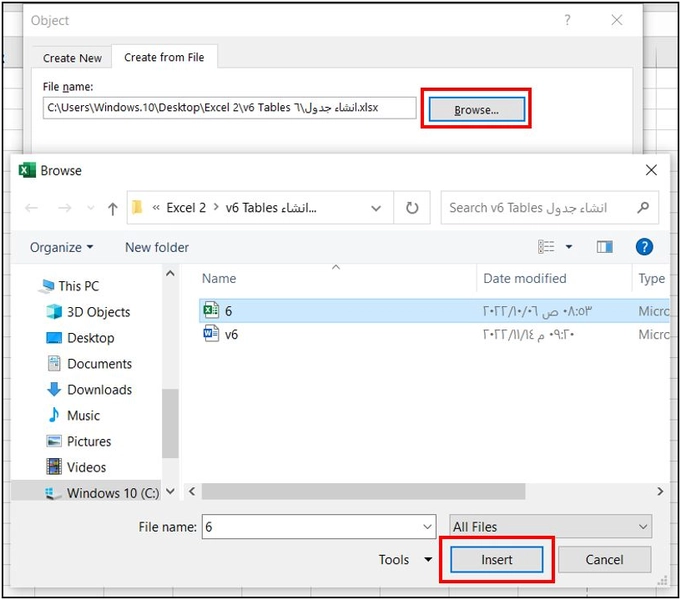
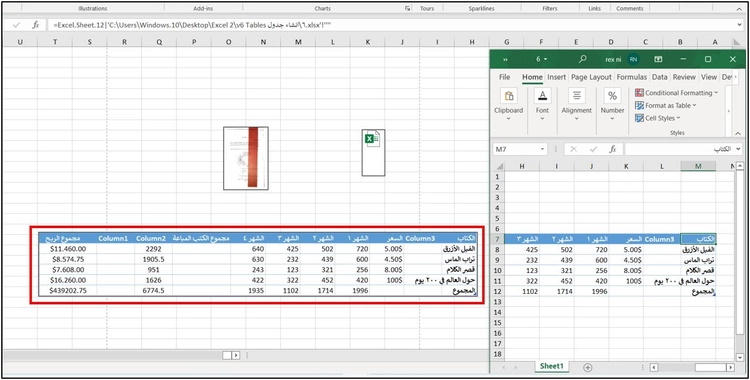
6-Here we do not choose “Display as icon”, and we can also choose “link to File”, in which case the first image in the file will be displayed with a link to the file. In the case of the link option, any change we make to this file will appear in the image expressing the file.
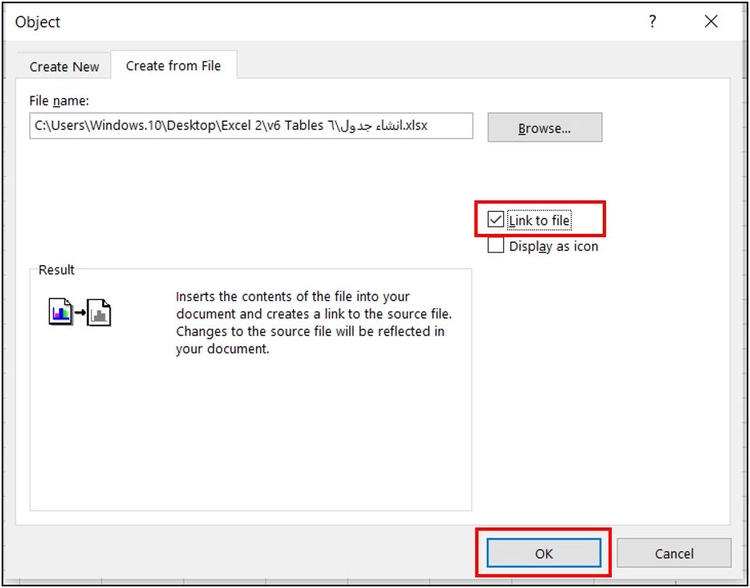
7- Then we choose “OK”. Now we notice the file appearing with an image, and if we click on the image, the attached file opens.
Dear reader, if you liked the article, do not forget to subscribe to our YouTube channel, which provides all new in the field of technical and completely free training courses.
You can also browse our website to access the blog and read technical topics, or learn about the training courses offered by the site.
To access the full course “Excel Course” on YouTube, click here.


