In this lesson, we will learn how to create a Custom sort by a specific cell order in Excel.
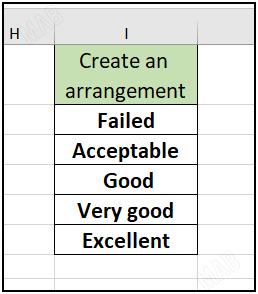
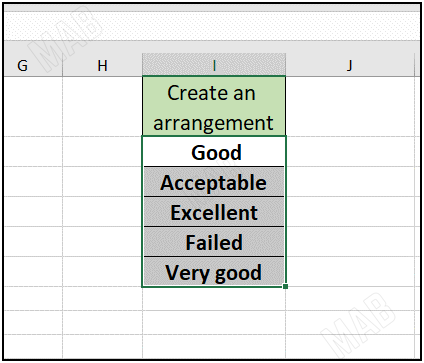
Suppose we have the following set of elements, and we want to arrange them according to the following order:
– Failed.
– Acceptable.
– Good.
– Very good.
– Excellent.
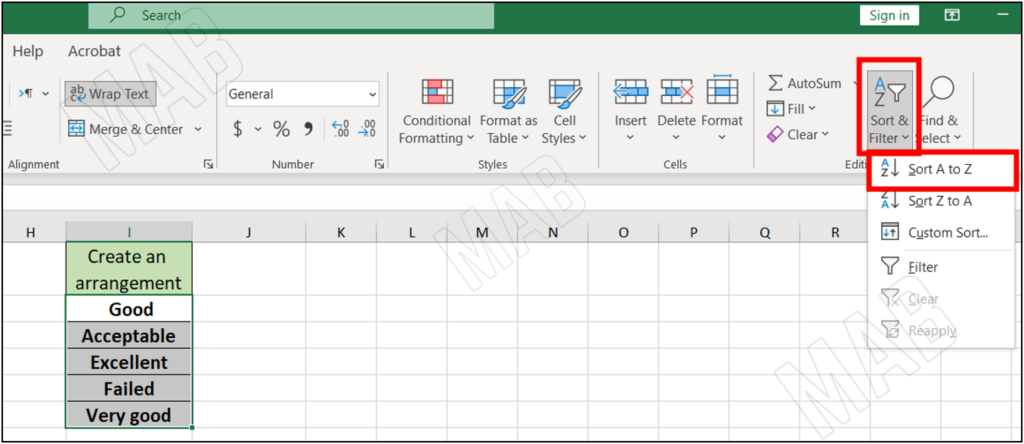
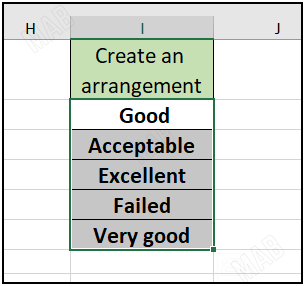
If you try to organize this order by alphabetical order, we will get the following order:
To create this new order (Custom sort ), we will do the following:
1- Select all the cells.
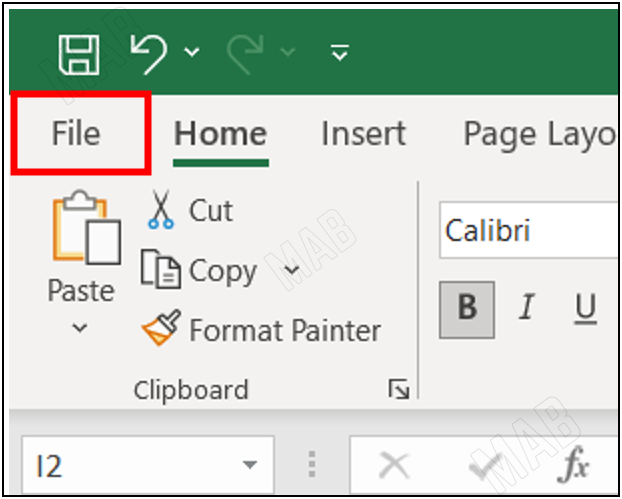
2- From the toolbar, choose “File”.
3- From “File”, choose “Options”.

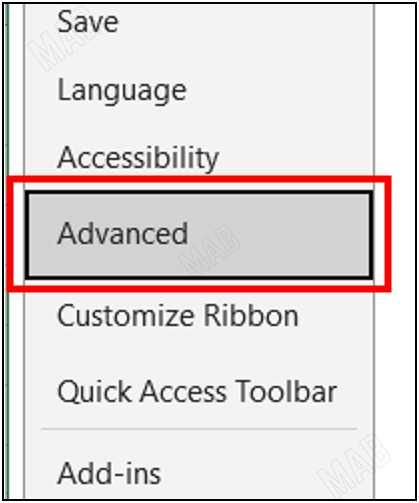
4- From it, choose “Advanced”.
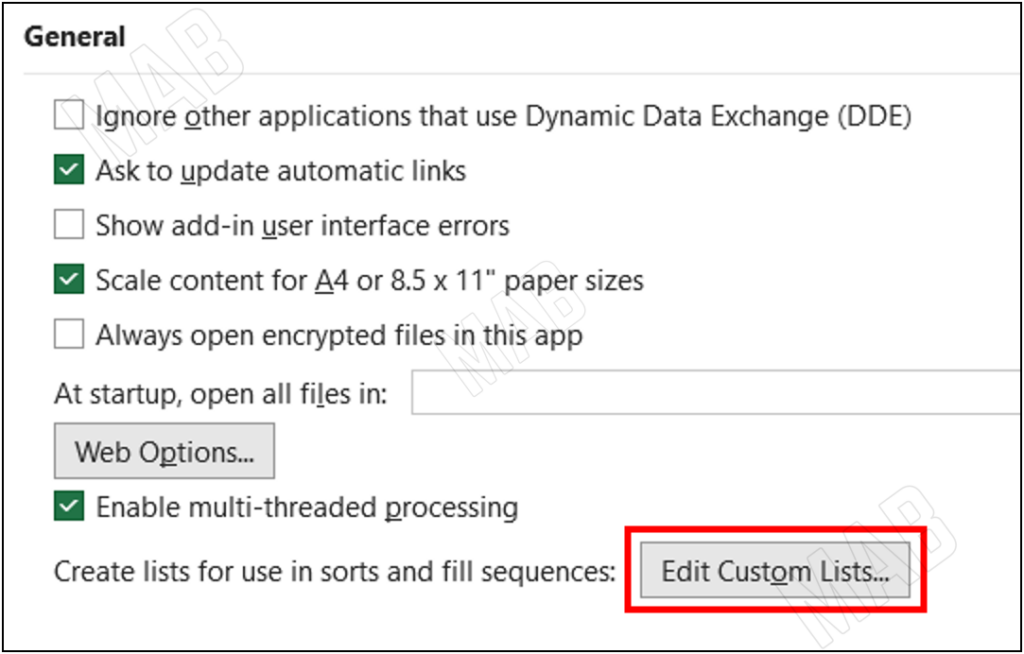
5- From it, we will go down and choose “Edit Custom List”.
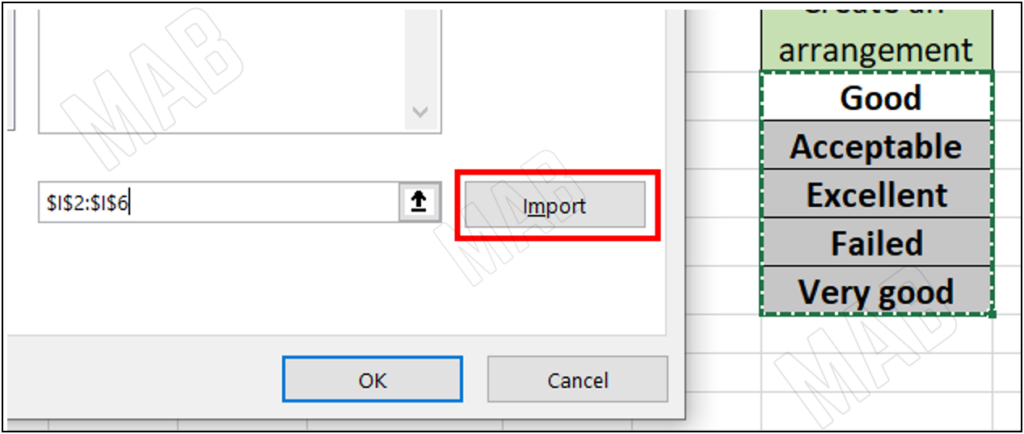
6- Click on the rectangle that contains the cells and choose “Import”.
7- Change the order of the cells to the order we want and choose “Add”.
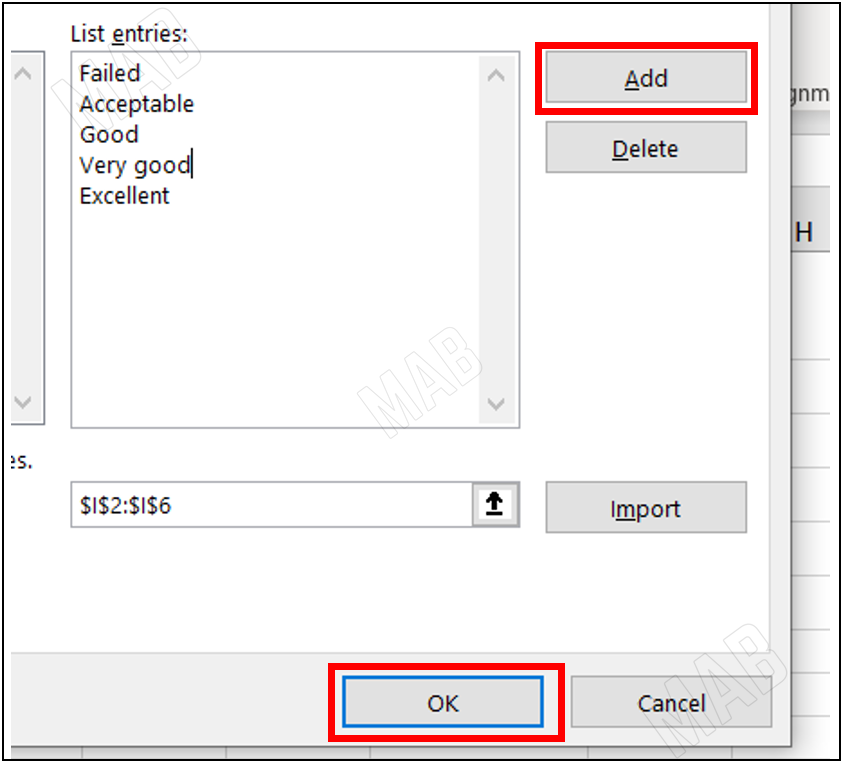
8- Choose “Ok”.
9- To arrange the cells again, select all the cells again.
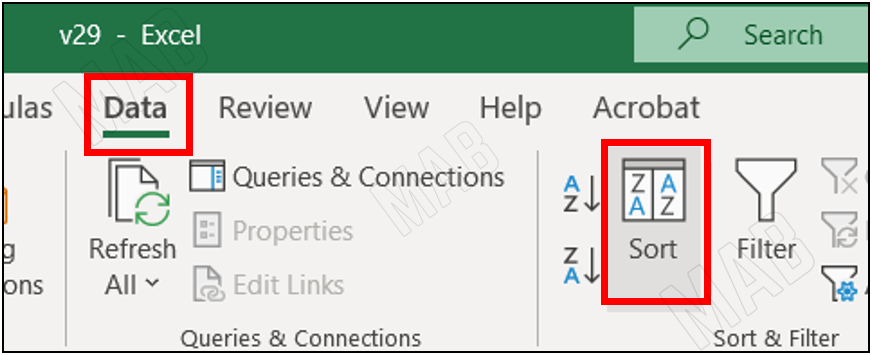
10- From the toolbar and from “Data”, choose “Sort”.
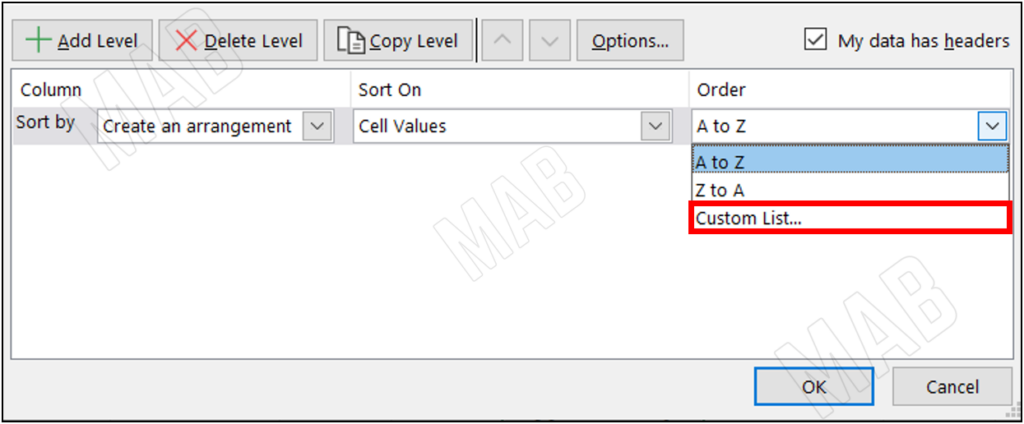
11- An interface will appear, from “Order” we will choose the “Costume List” option.
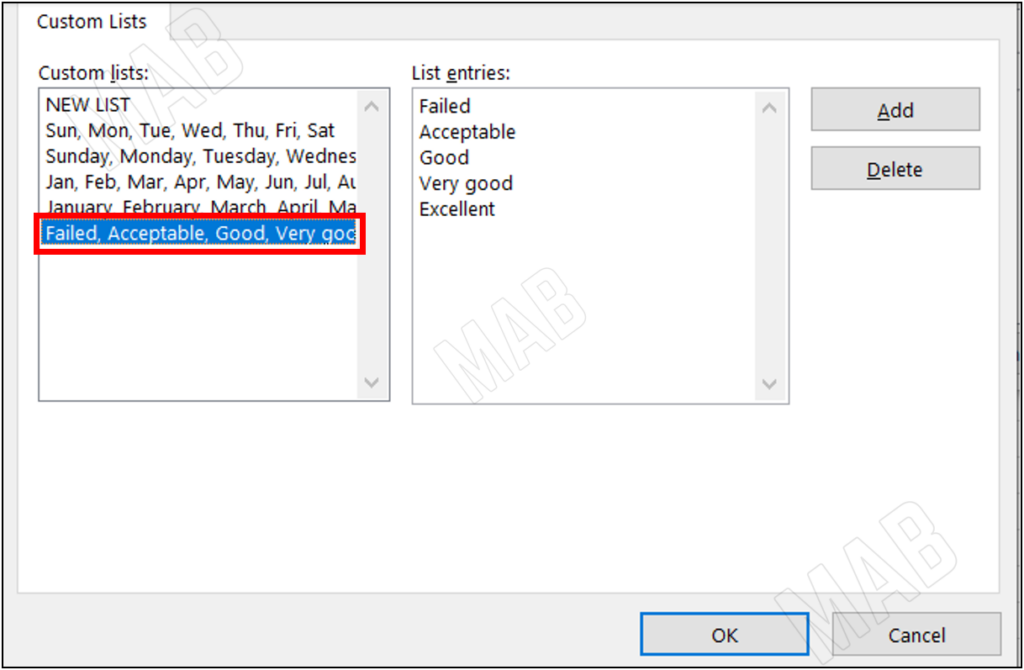
12- We choose the order we created and then click “Ok”.
We will notice that the cells are in the Custom sort we created.
Dear reader, if you liked the article, do not forget to subscribe to our YouTube channel, which provides all new in the field of technical and completely free training courses.
You can also browse our website to access the blog and read technical topics, or learn about the training courses offered by the site.
To access the full course “Excel Course” on YouTube, click here.


