How to use artificial intelligence in the case of “Whisper ai” to convert audio to text. Also, video to text. Thus, converting audio to writing in the fastest way. The result will be either a text file containing the exact speech in the clip and in very high quality. Or a translation file that you can use in your video files on YouTube or others.
This tool is currently free. There are also a large number of languages that can be used.
To be able to use the software, we must have the appropriate environment so that we do not install any software on our devices. In addition, we must have a “Google” account, knowing that it is free.
Access to the tool to convert audio to text using artificial intelligence
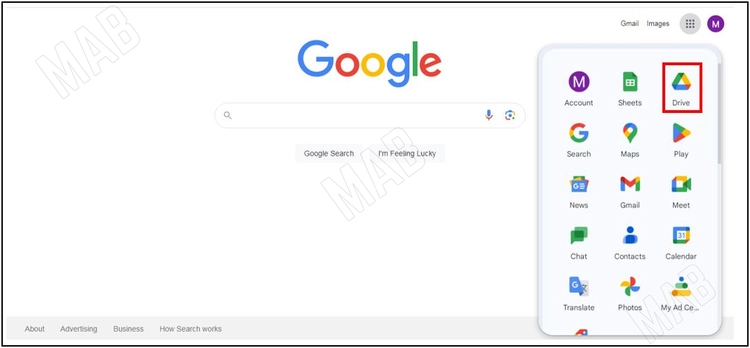
First, we create the account. Then we go to the main “Google” page. Then from the options at the top, we go to “Drive”.
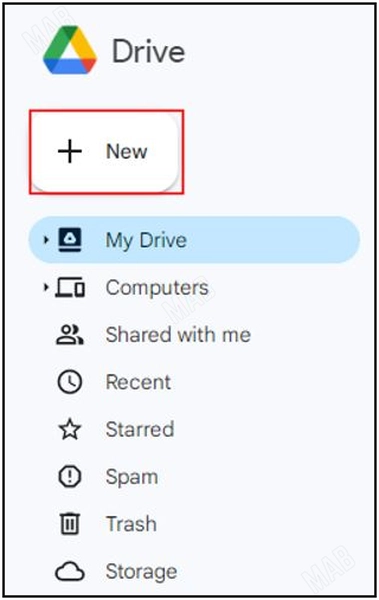
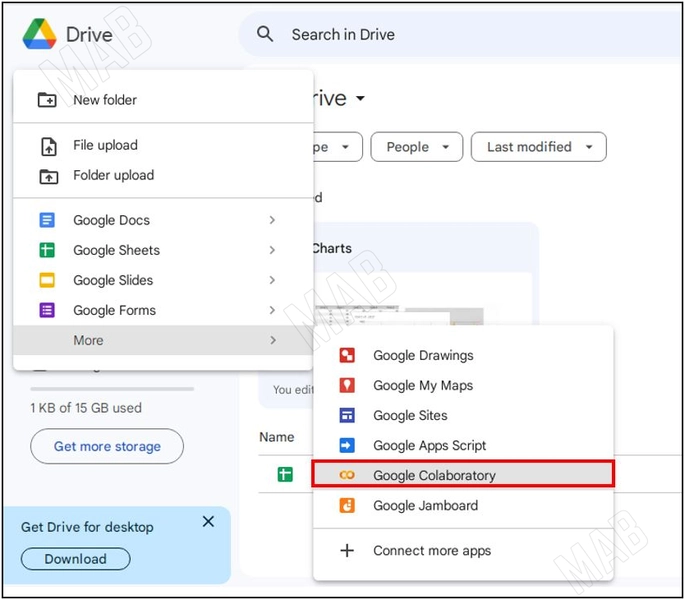
From the menu, we click on “New”.
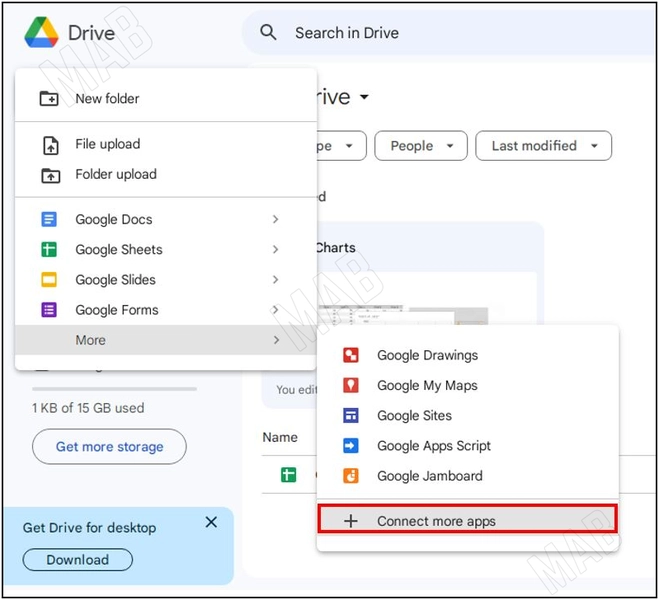
Then from the next menu, after displaying “More”, we choose “Connect more apps”.
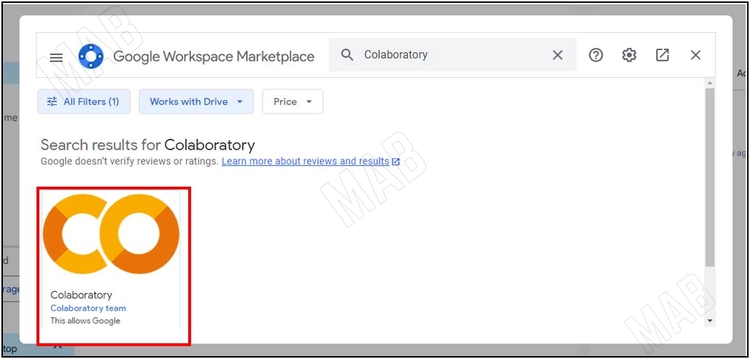
We search for a software called “Colaboratory”.
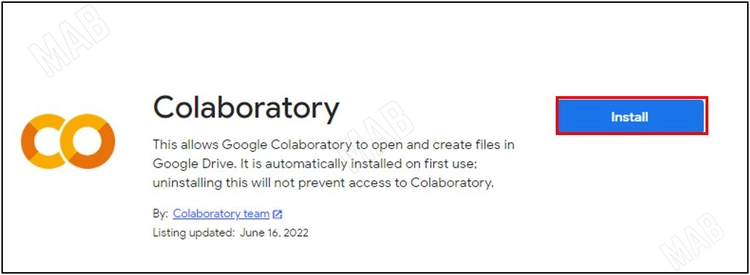
After clicking on the software, we click on “Install” to install it.
After installing, we return to the “New” menu. After displaying more, we choose “Google Colaboratory”.
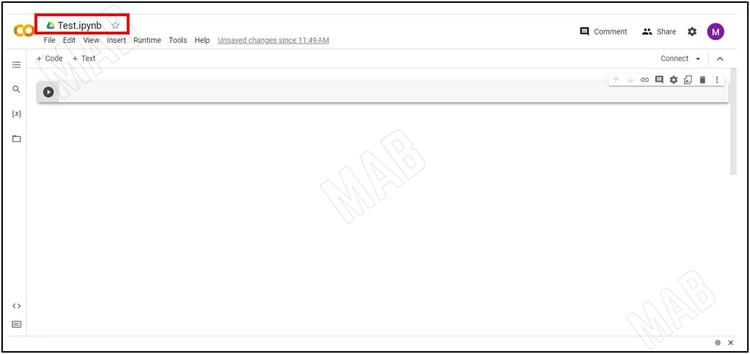
It will create a new file with the type “Google Colaboratory”, and will give us the option to modify the name so that we can return to the file later.
Preparing the tool to convert audio to text
For example, we will name this file “Test”.
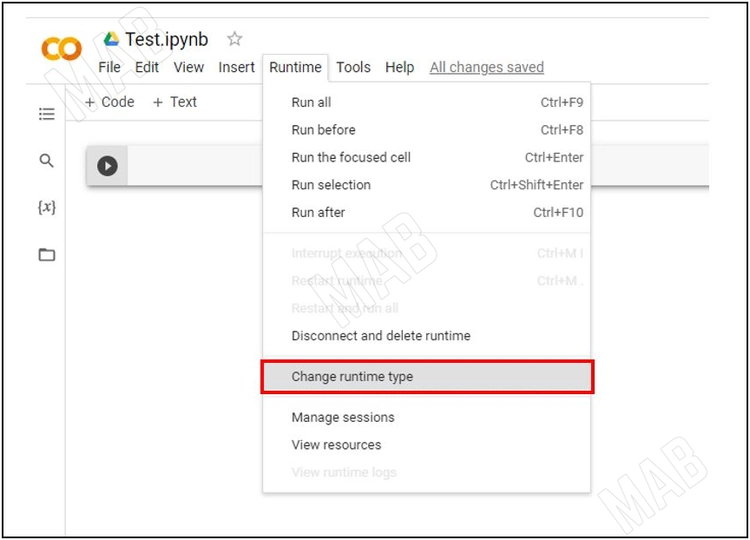
Some properties that we will change, in the “Runtime” menu we choose “Change runtime type”.
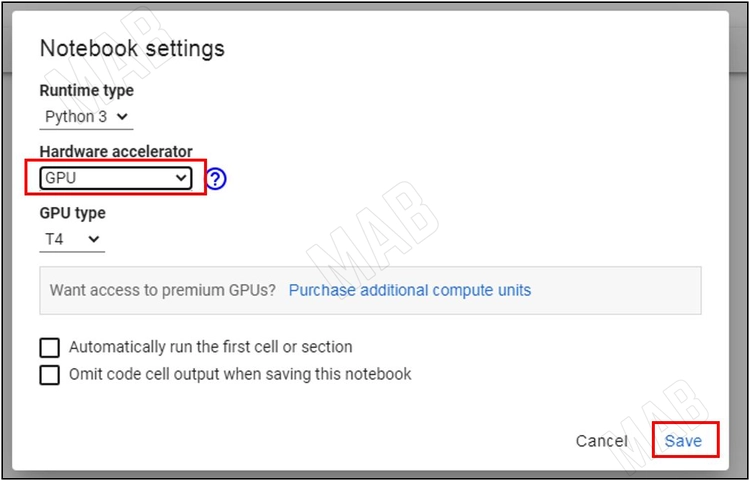
From the “Hardware accelerator” menu we choose “GPU”, even if the files are very large, the “GPU” option will help us, then we click “Save”.
To install “Whisper ai”, we have the following code to download it from “whisper.git”:
!pip install git+https://github.com/openai/whisper.git
!sudo apt update && sudo apt install ffmpeg
You can also find this code on the official “Whisper ai” website:
We must copy the code and paste it in the specified location, and then press the “Run” tab.
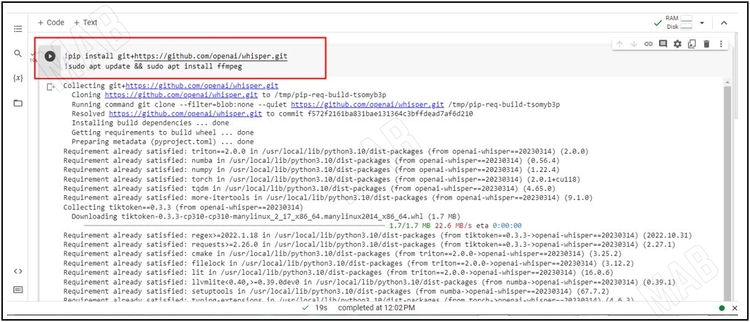
Then it will install “whisper ai”, the installation process may take from thirty seconds to a minute.
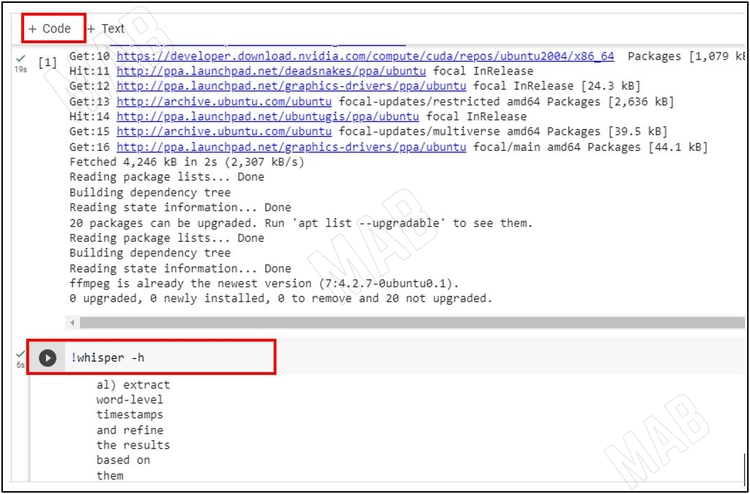
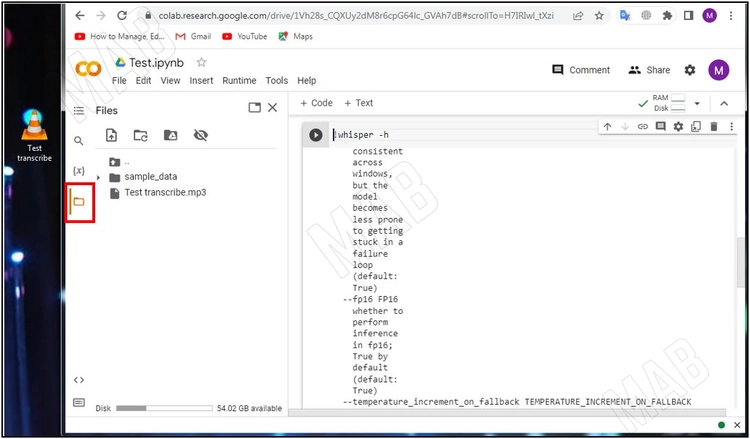
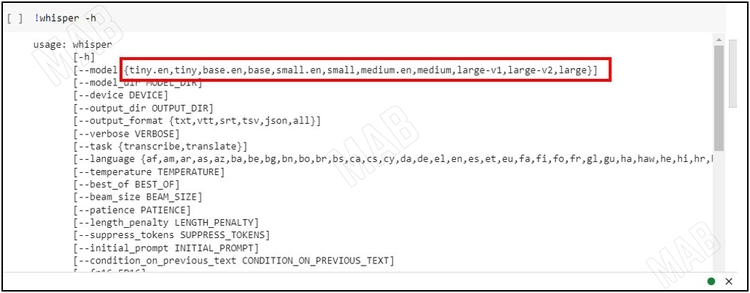
To be able to see all the features in “Whisper ai”, we either click on “gethub” from the home page or click on “+Code”, then type “!whisper –h”, then click on the “Run” sign. It will show us all the features in “Whisper”. We can modify these features as we wish, such as the languages available. In addition to the different features that we can work with.
But now we want to try the simplest thing. We have an audio clip on the desktop, and we want to convert it from audio to text.
By clicking on the “File” sign on the left of the page, then we will drag the audio file that we want to convert and put it in the files list.
Transcribe the required file into text.
After uploading the file, we will click on “+Code”. Then we write in the specified place (!whisper “Test transcribe.mp3” –model). It is also important that the file name matches exactly when written in the formula.

Then we specify the resolution we want to convert the audio to text. If we go up to the “whisper” properties, we can see the available resolution properties. We will choose the appropriate resolution “medium” so that the size of the output file is not huge.
We type the resolution we chose and then click the “Run” arrow.

If the file size is large, it will take a little time. When finished, it will tell you that it took, for example, 30 seconds to determine the language. However, this time can be shortened by writing (–language ar) to specify that the required language is Arabic. We can also replace (ar) with the code of the language we want.

We see that it has read the file and determined its contents with the timing so that we can review it.
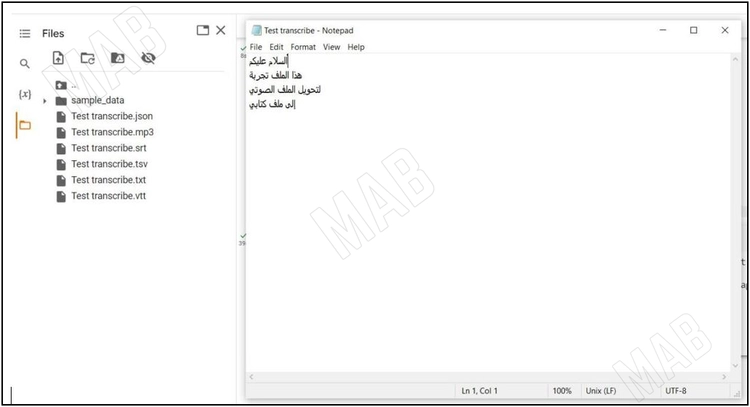
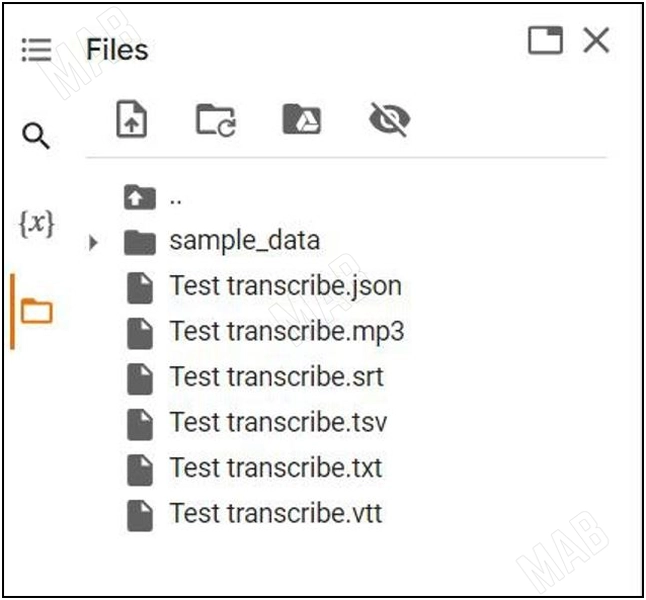
When finished, we notice that it has given us a set of outputs in the “Files” list.
Download the file resulting from transcribing the audio into text.
We will download two types of them, “srt” and “txt”, by clicking on the options for each one, then “Download”.
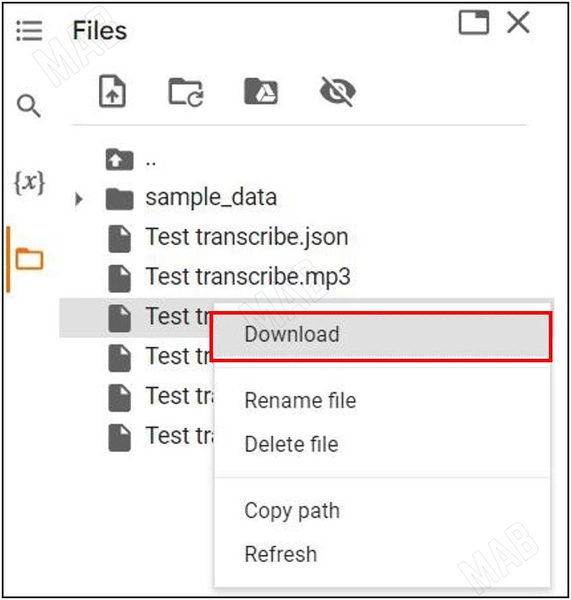
We can use “srt” in translation anywhere, for example on YouTube. If we upload this file to the clip, the accuracy will be excellent, but we need to review it with the timing in case there is an error. Also, the “txt” file, if we open it, a text file will appear, containing all the words in the clip, we may also need to review it to make sure that all the words are correct.